
Nome II Manual: all contents
This page contains all manual chapters, all Quick Start answers, and the technical overview.
Use your browser to search, save as PDF, or print this page.
Buttons & Connectors
Front view
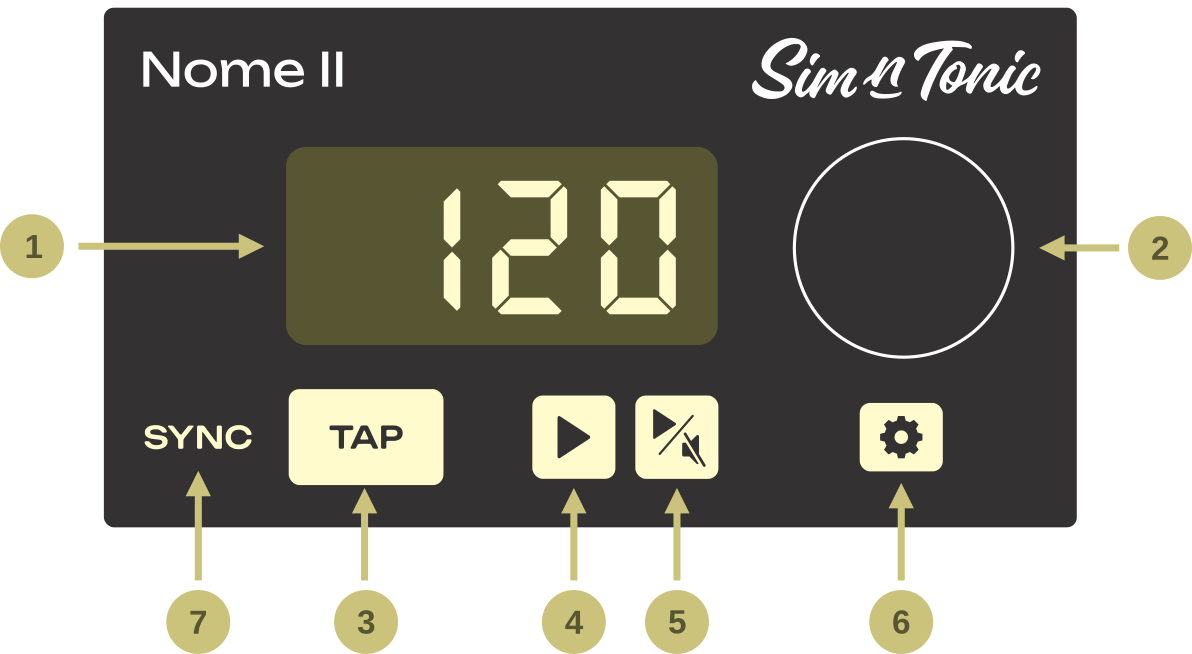
Display - shows the current tempo (or current setting/value/info)
Knob
turn it to change the tempo, or change settings/value
press it to validate or change the tempo decimals
Tap Tempo Button - blinks at tempo (purple on downbeat, yellow on other beats)
Play Button 1
start/stop your gear on MIDI Out 1
hold down to resync/restart your gear
Play Button 2
Same as above, but for MIDI Out 2
Can be configured to mute the metronome (see the ”PL.2” setting)
Setup Button - enter and leave the settings, hold down to turn off the device
SYNC LED:
Yellow
 when the device is synced to
U-SYNC
when the device is synced to
U-SYNCPurple
 when the device is synced to an external audio
signal
when the device is synced to an external audio
signalBlinks momentarily green
 or red
  at every tap when tapping
the tempo
at every tap when tapping
the tempo
Combo actions:
Hold
 + rotate
 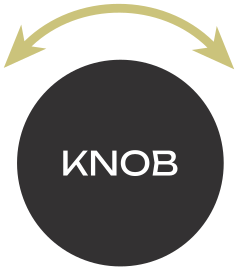 to change the metronome’s volume
Hold
+ press  or
or  to nudge the
time backward or
forward
to nudge the
time backward or
forwardHold
 + rotate to apply previous or next
Preset
+ rotate to apply previous or next
PresetHold
while tapping to tap quicker tempo
changes (no averaging)Hold
+ hold  for 1 sec to “lock” the tempo
Back view
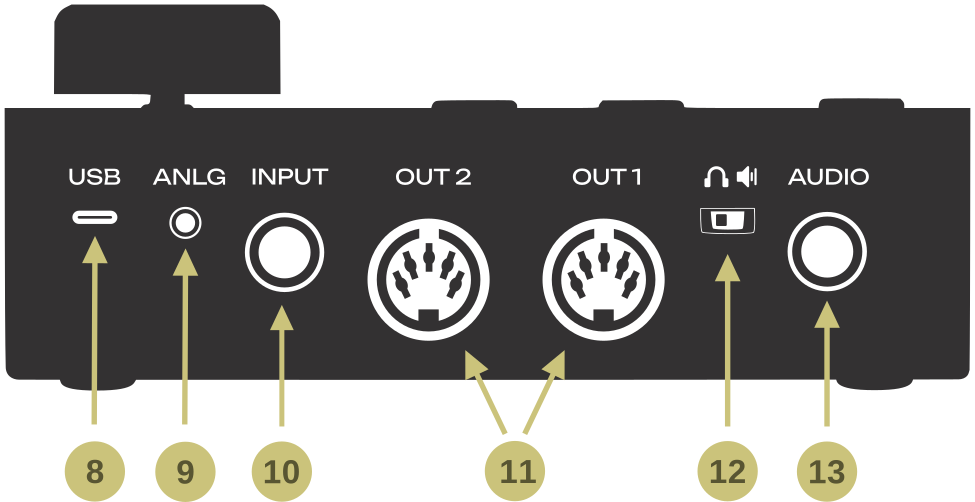
USB Type-C plug
Powers the device
USB communication with a computer
CV/Analog/DIN Sync Clock Output
- 3.5mm TRS plug(stereo jack)
sends 5V analog pulses on both Tip & Ring for your modular synths
can be configured to DIN Sync (sync24) for vintage gear
this will require a TRS-to-DIN Sync adapter
Multi-function Input
6.35mm TRS plug (stereo jack)
plug in 2 pedals here (one on Tip/Left and one on Ring/Right)
plug a drum pad here (to tap the tempo and/or time signature)
send an external sync signal here (see external sync section)
MIDI Outputs
Sends MIDI Clock, MIDI Start/stop, and forwarded USB-MIDI messages
Start/stop can be independently controlled on each port
Headphones/Line Out switch
selects headphones (
) or balanced line out (
) for audio out (6)
Audio Output
6.35mm TRS plug (stereo jack)
plays metronome click
Do not send phantom power (+48V) to this output
Settings
The settings are different configuration options changing the way the Nome will act or react, when for example a button is pressed, or when a piece of hardware is plugged in.
Because it is so versatile, the device has many settings and a lot of different possibilities to configure it. But you probably only want to change a few to fit your setup, so it’s just a matter of having a quick overview of what’s possible, changing it, and forgetting about it.
Editing the settings
The settings are accessible by pressing .
Use to select, change, and save a setting value.
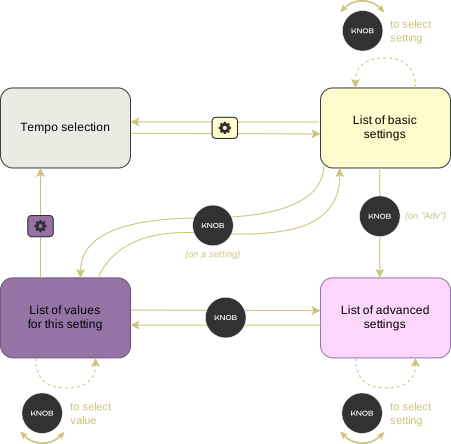
Step |
Knob turn |
Display example |
|---|---|---|
Tempo selection |
Changes the tempo |
|
List of basic settings |
Changes the selected setting |
|
List of advanced settings |
Changes the selected setting |
|
List of values for this setting |
Changes the value of this setting |
|
The color of the setup button will change according to the
step: 

All settings are saved and applied automatically. They are also preserved when the firmware is updated.
Reading letters and abbreviations on the display
Understanding what the display is telling you can be a bit tricky if you are not used to it. This is the alphabet used by the Nome:
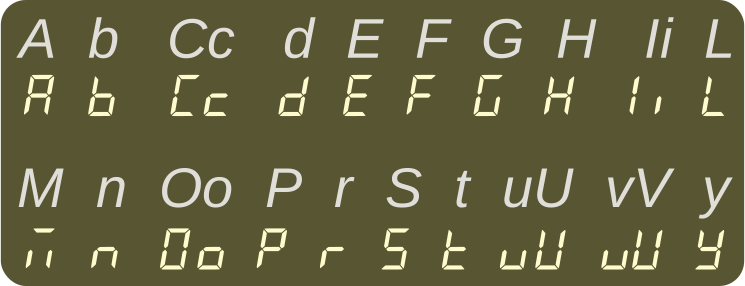
Note that the dot is used for separation, for example: 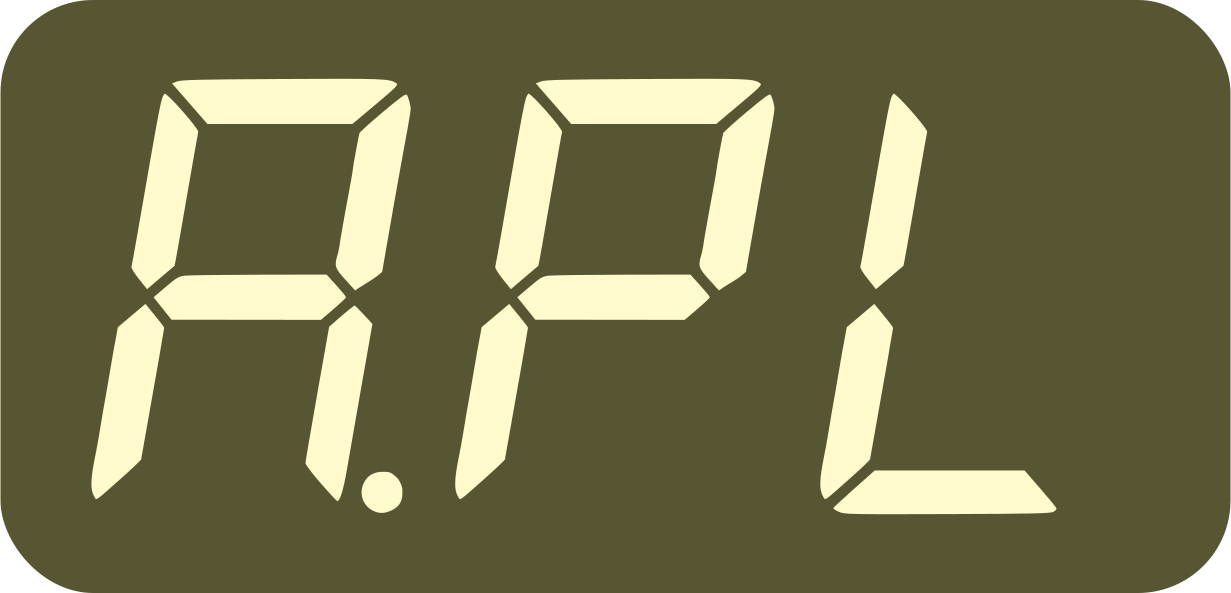 reads
Auto-Play.
reads
Auto-Play.
The 3-letter abbreviations used are trying to be as clear and as consistent as possible.
Here is a list of all setting names abbreviations and their meaning:
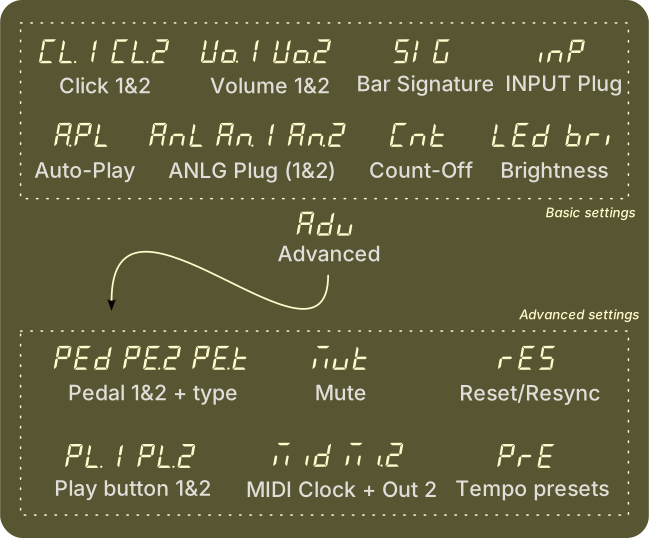
And here are some of the other abbreviations used (as setting values, among others):
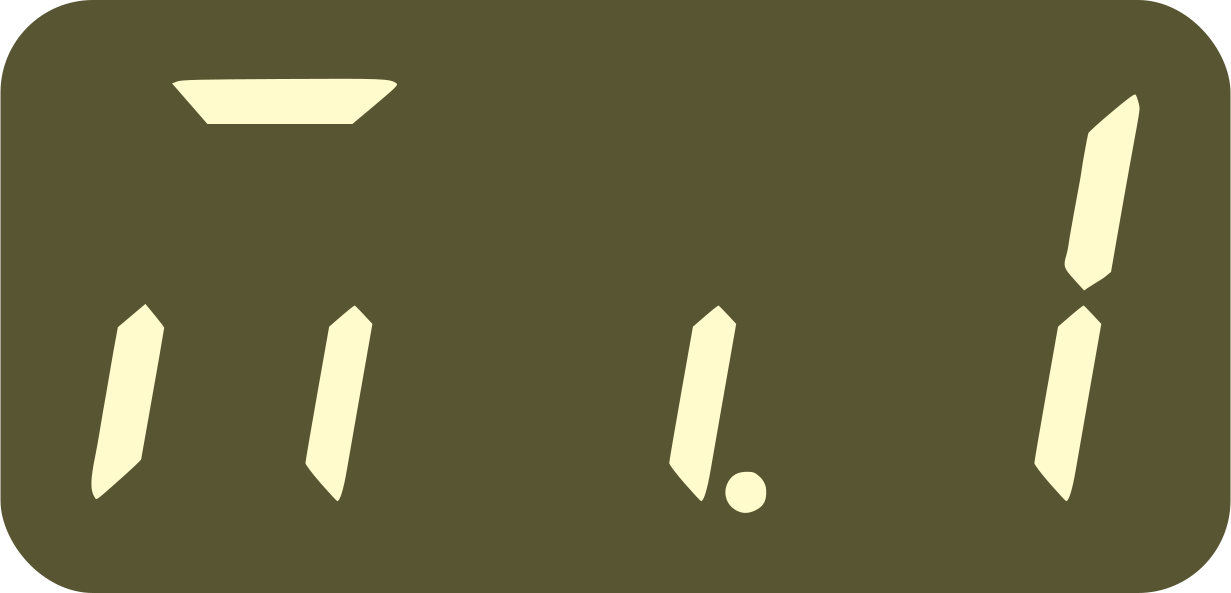 &
& 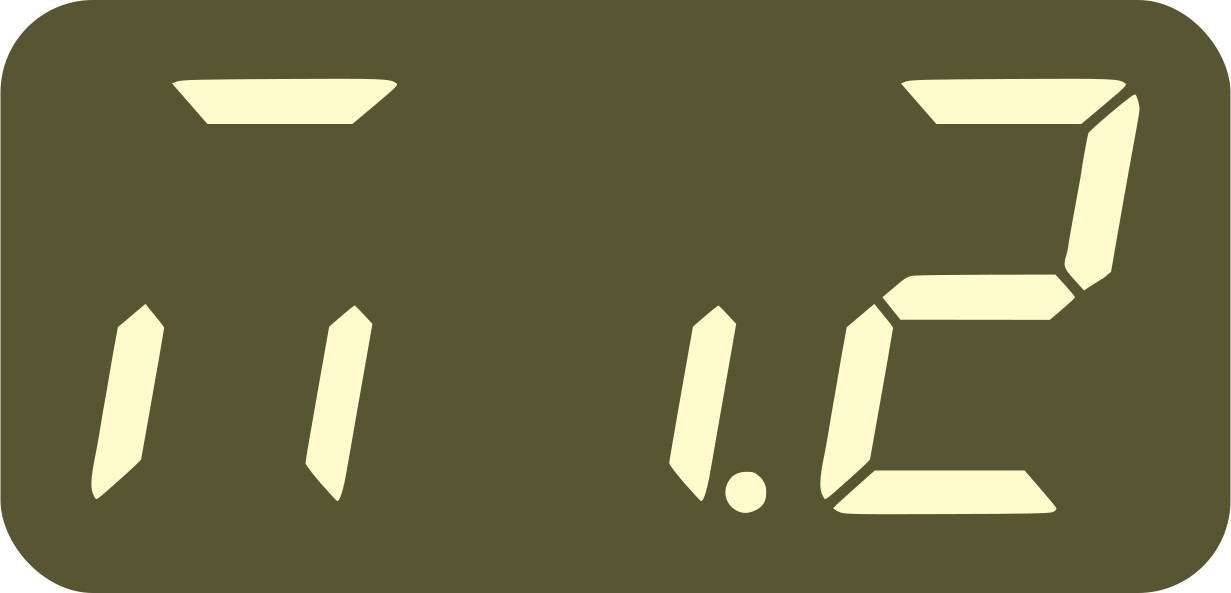 : MIDI Output 1 and 2 (on the back of the device)
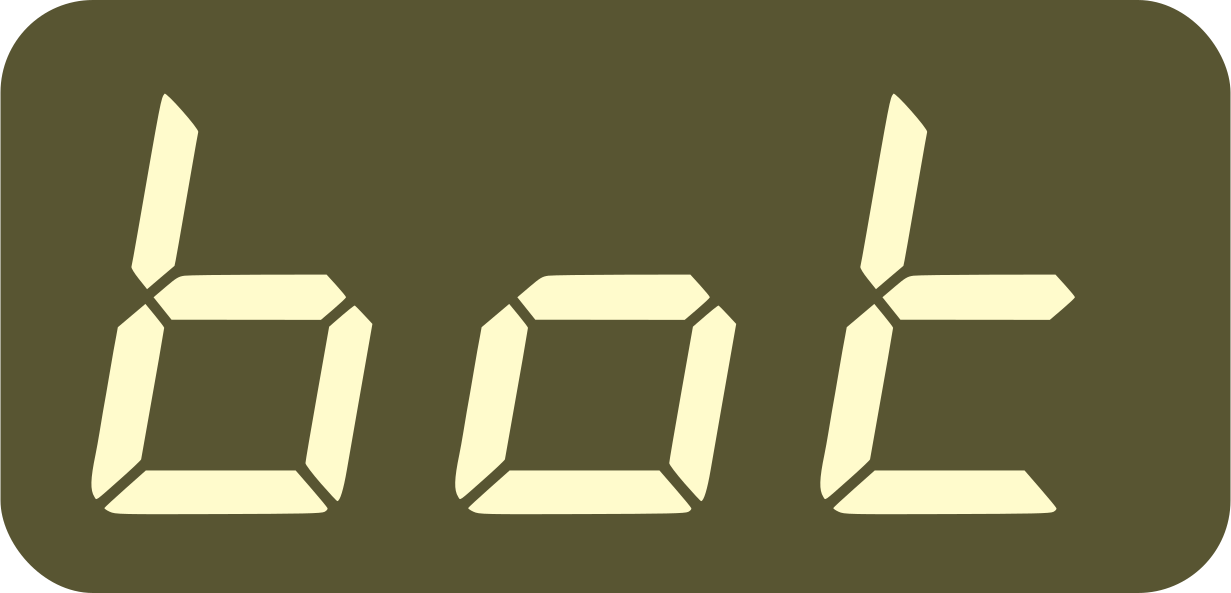 : both MIDI Outputs (1 and 2)
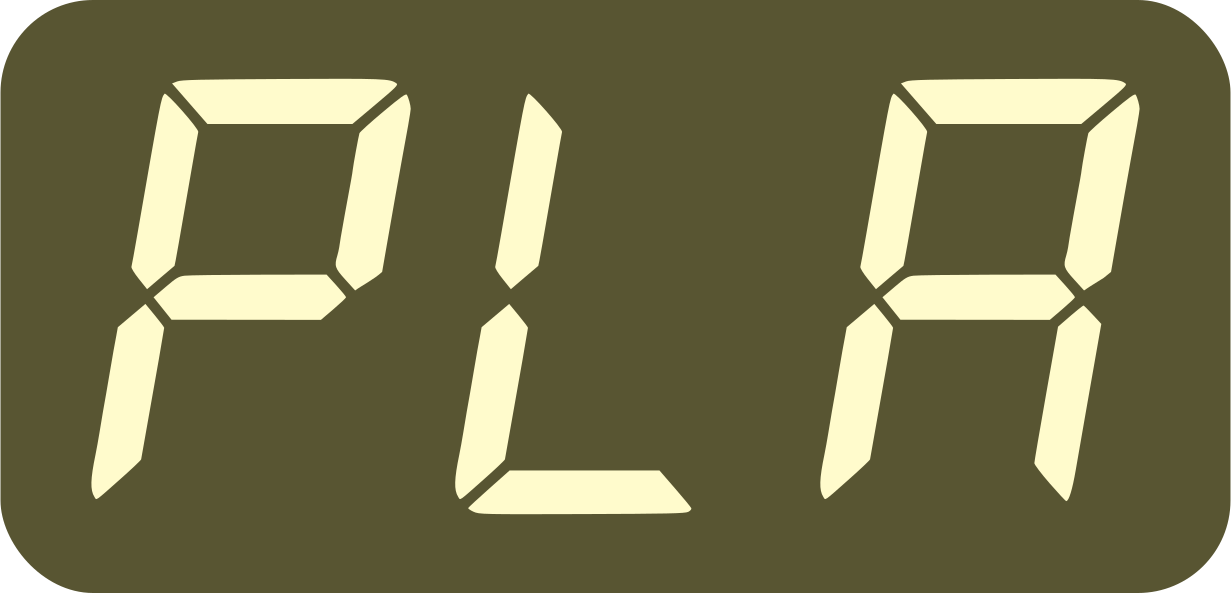 : Playing function, i.e. the ability of doing start/stop
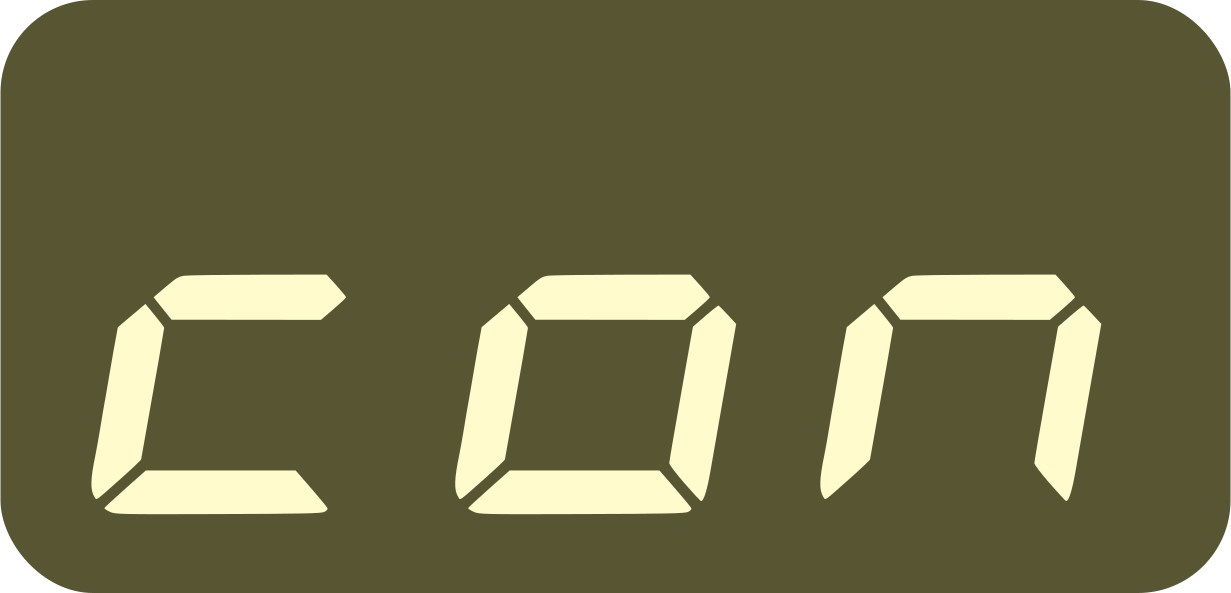 : constant, i.e. something that is permanently on
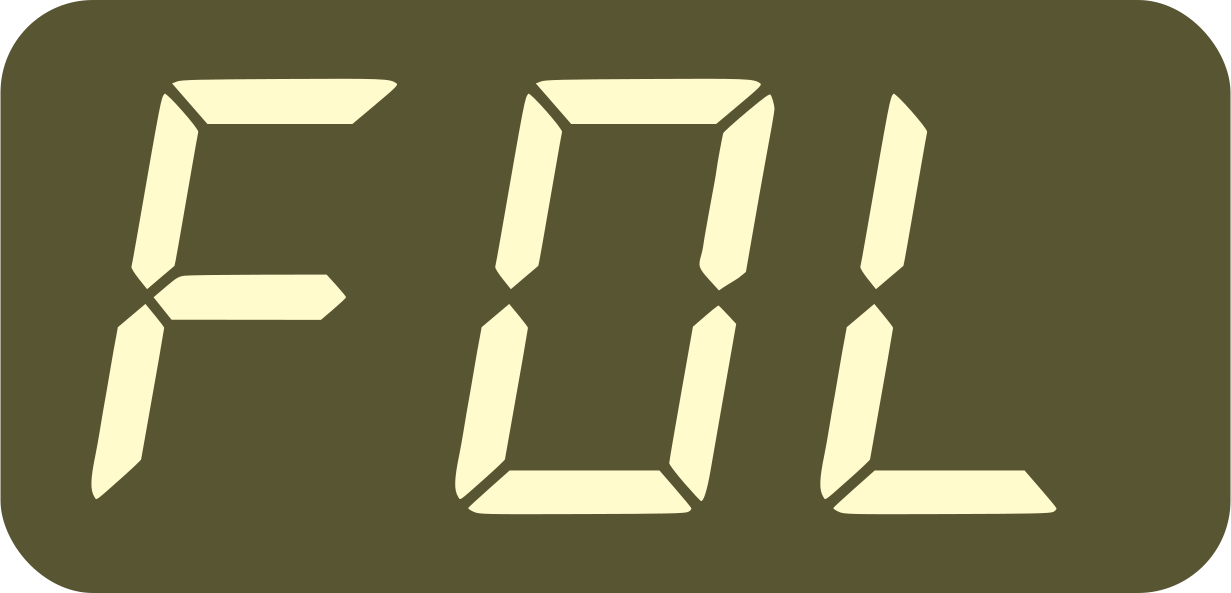 : follows Play, i.e. something that is only on after a
Play button is pressed
: follows Play, i.e. something that is only on after a
Play button is pressed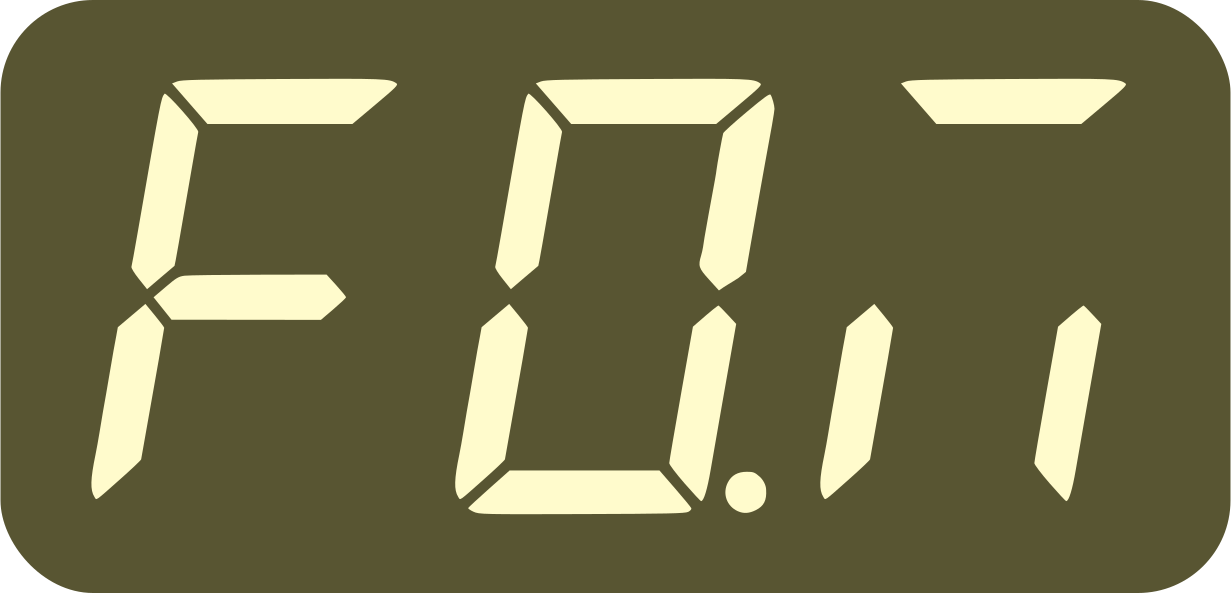 : follows Mute, i.e. something that is on when the metronome
is unmuted
: follows Mute, i.e. something that is on when the metronome
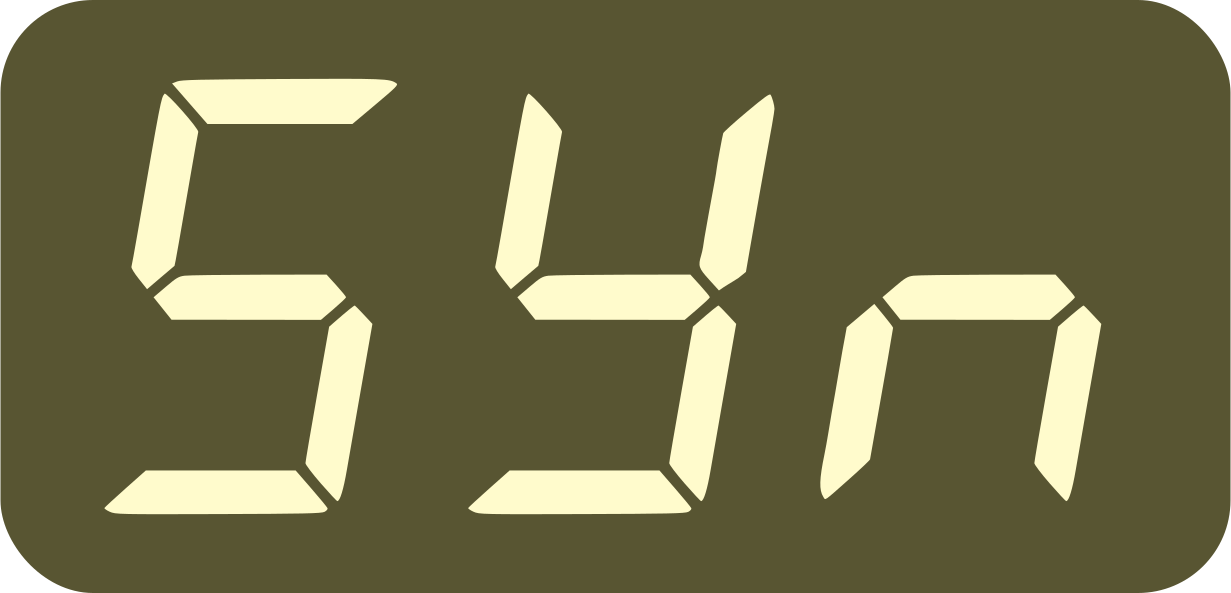
is unmuted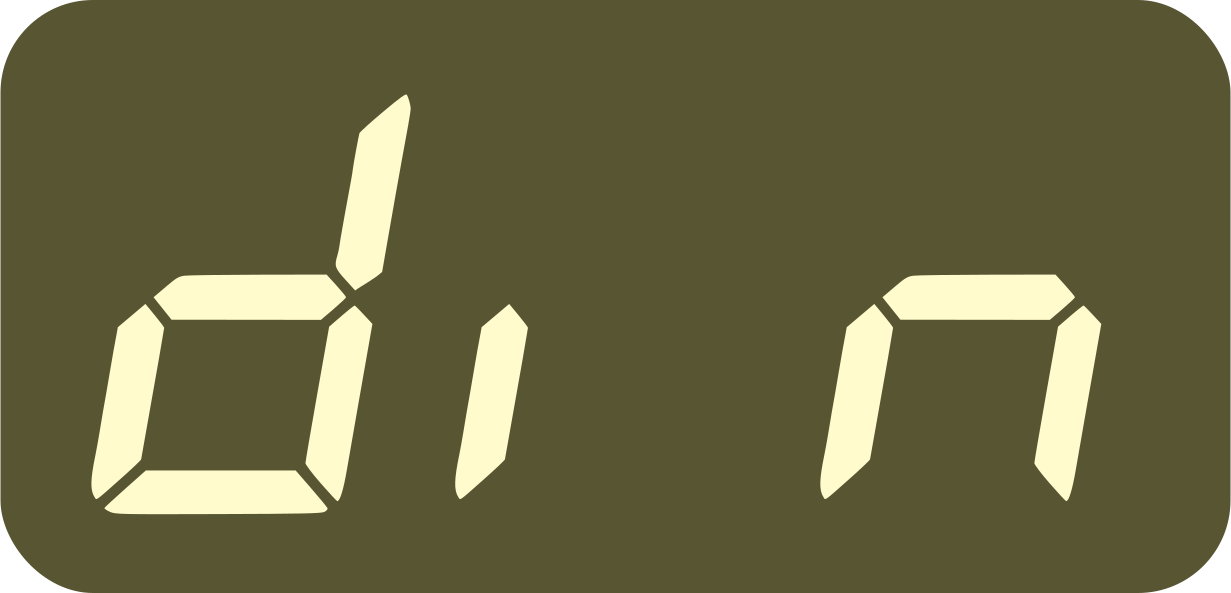 : DIN Sync mode (also called sync24)
 : resyncing, typically sent on the device’s MIDI and ANLG
outputs
: resyncing, typically sent on the device’s MIDI and ANLG
outputs
Considerations on how to configure your Nome
There are quite a lot of settings, but most of them are very simple. Just have a quick look at the list so you know what is possible, and you can forget about the settings that do not concern you.
Most users report they went to the settings once, to customize their Nome to their liking, then never went back in again.
To make it less overwhelming, they are separated in two lists, the advanced settings being less likely to be changed regularly.
Note that whenever the device has to choose between MIDI Output 1 and 2 to trigger an action, MIDI Output 1 is chosen. In other words,
For example:
When the TAP LED, the Mute function, or the ANLG outputs “follow play”, they will follow whether MIDI Output 1 is playing or not
When configured in DIN Sync mode, the ANLG output follows MIDI Output 1
When the first play button is configured to act on both outputs, it will light up according to MIDI Output 1
On the other hand, when it’s explicit, the Nome chooses the appropriate output.
For example:
any configuration on the ANLG ring/right
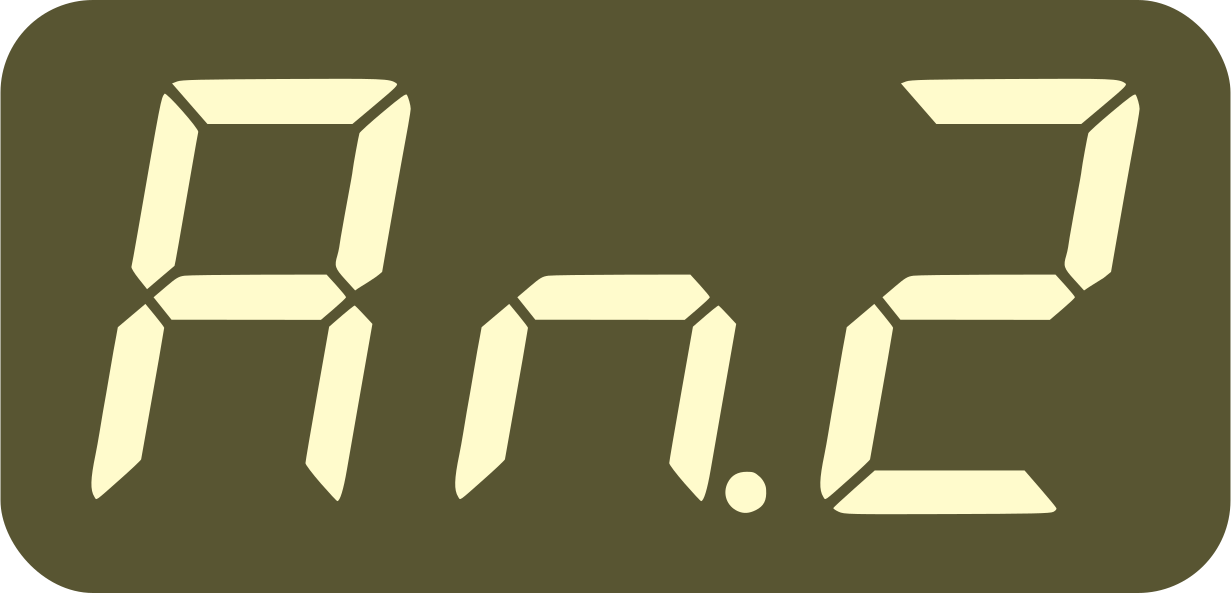 will follow MIDI
Output 2
will follow MIDI
Output 2
(while
will follow output 1)
The second play button will always act on MIDI Output 2
Two pedals configured as
will each act on their own output
The list of basic settings
Setting |
Meaning |
Values |
|
Sound for Click 1 (downbeat) |
|
|
Sound for Click 2 (other beats) |
|
|
Volume of Click 1 (1) |
|
|
Volume of Click 2 (1) |
|
|
Time signature |
Bar signature from 1/2 to 32/16 (16 shown as ö). For example:
(to change the denominator quickly, hold down the knob and turn) |
|
INPUT Plug Mode |
|
|
Auto-play Mode |
(the two ANLG outputs always follow their respective MIDI
output, so these will also play if |
|
Analog Clock Mode |
|
|
Analog Clock 1 Speed (left/tip part of the ANLG TRS plug) |
|
|
Analog Clock 2 Speed (right/ring part of the ANLG TRS plug) |
|
|
Count-off Mode |
|
|
TAP LED brightness |
|
|
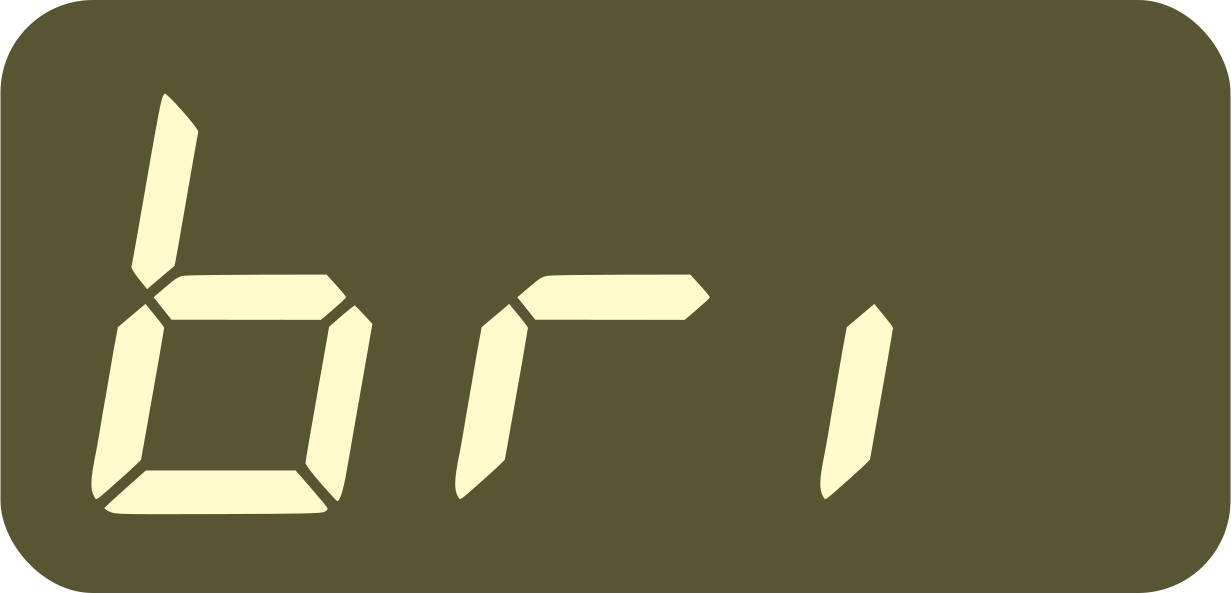
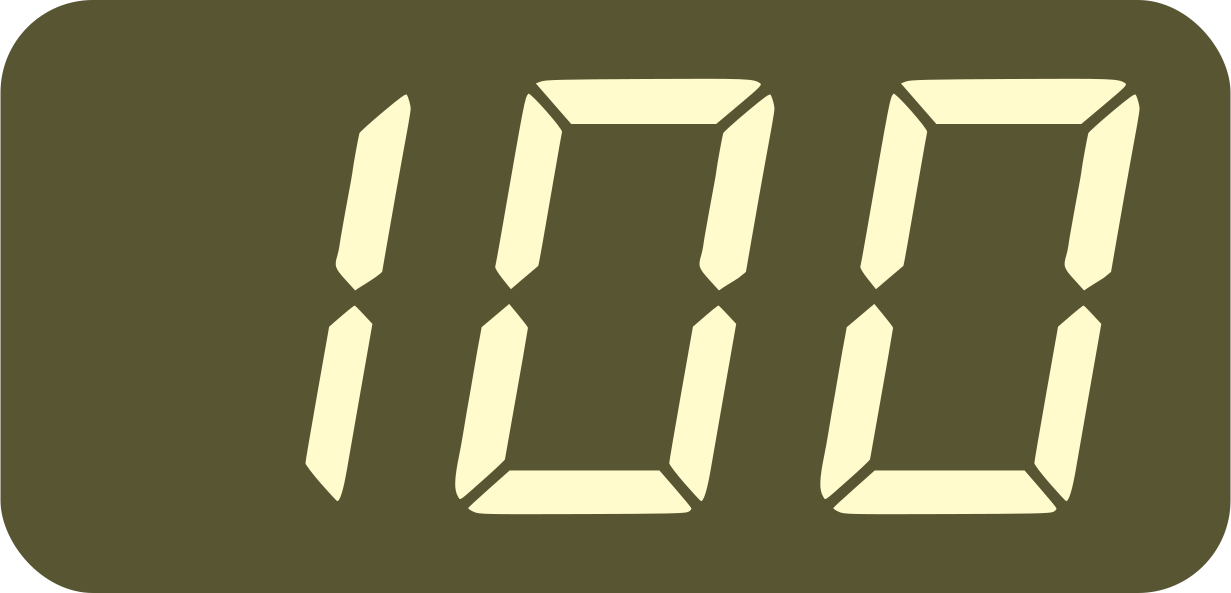
Display Brightness |
|
|
Advanced settings |
Opens the list of advanced settings |
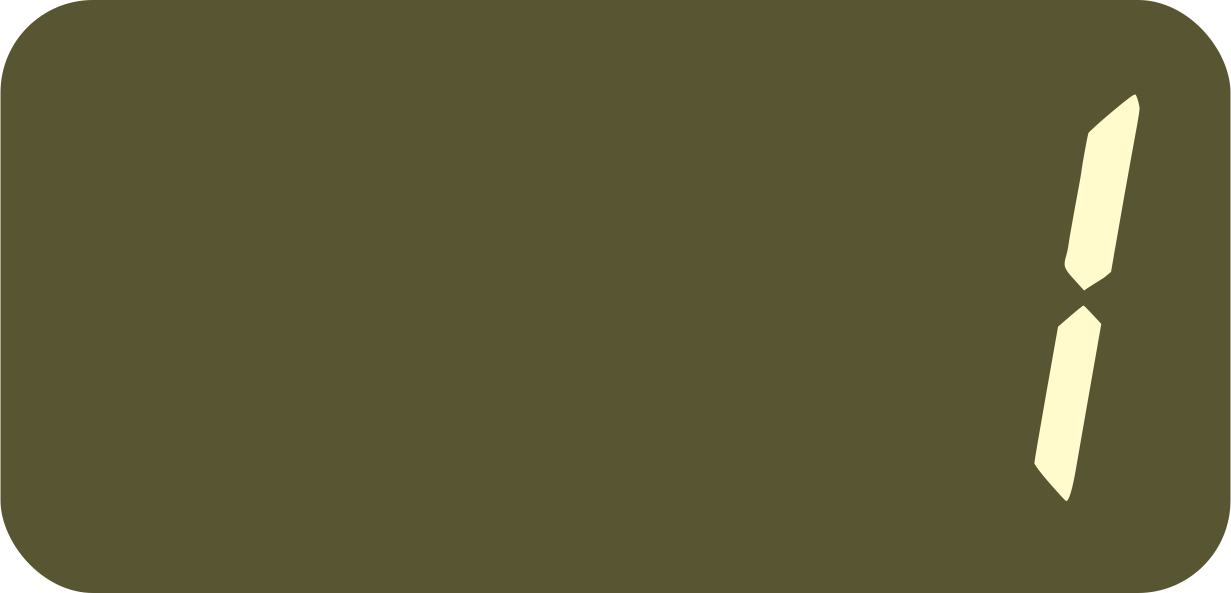 to
to 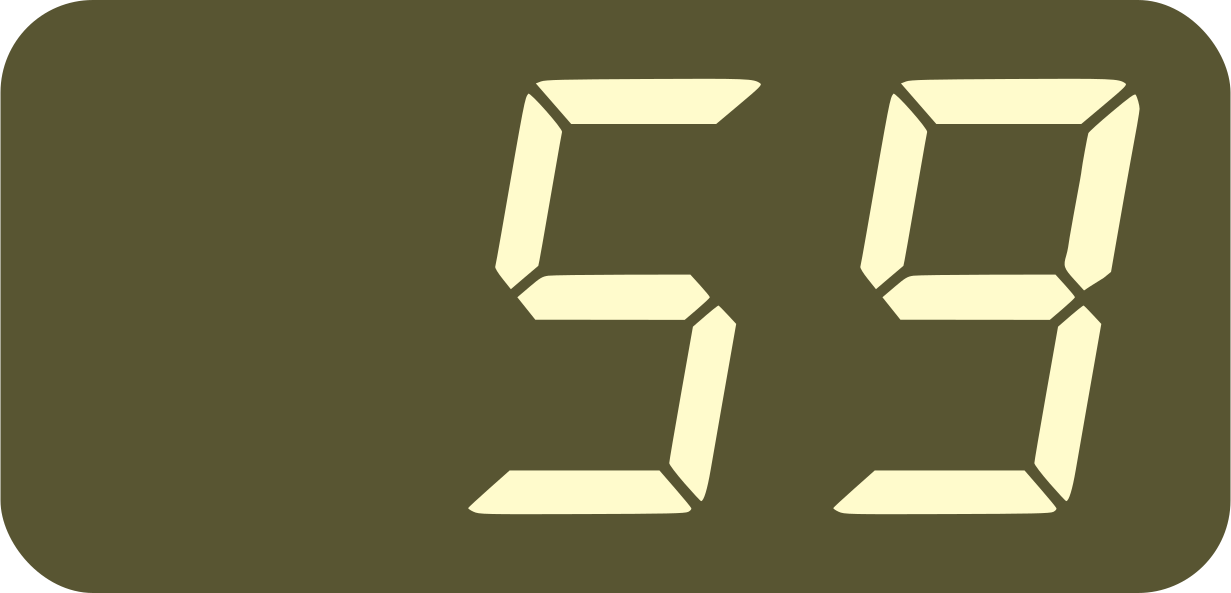 - sound selection for the metronome click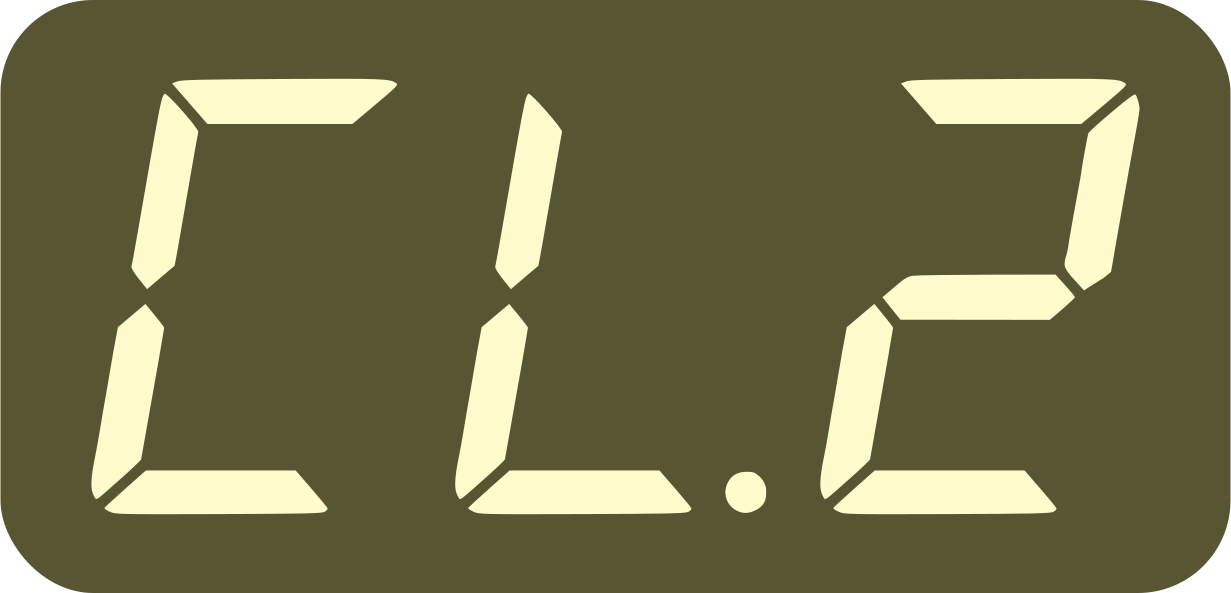
 Volume of the metronome click (in 6dB steps)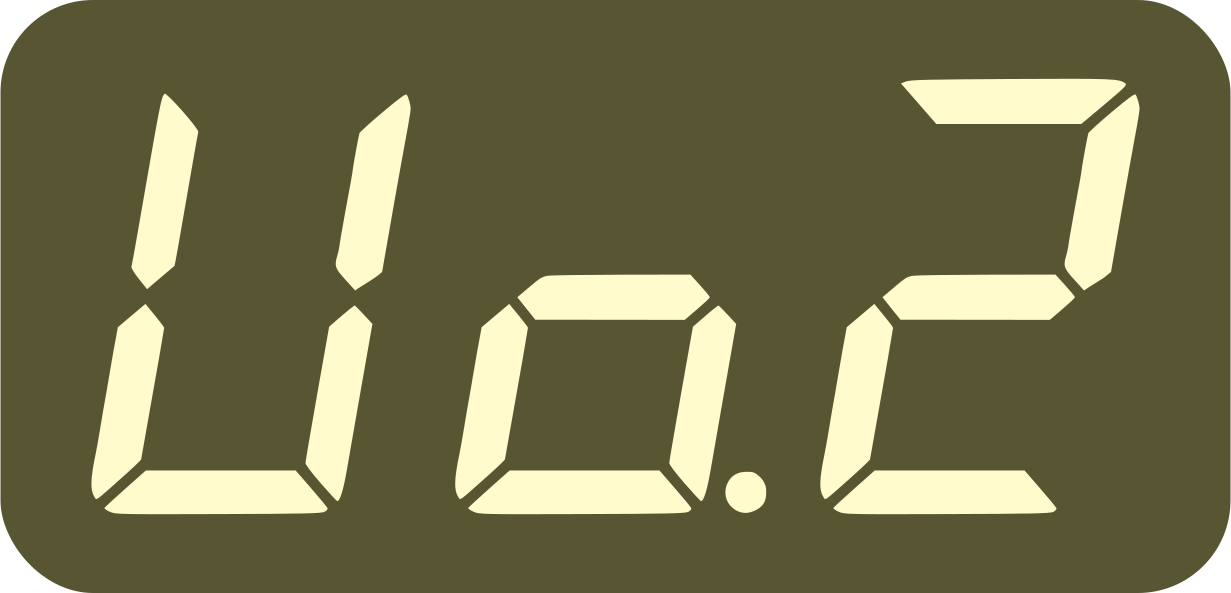
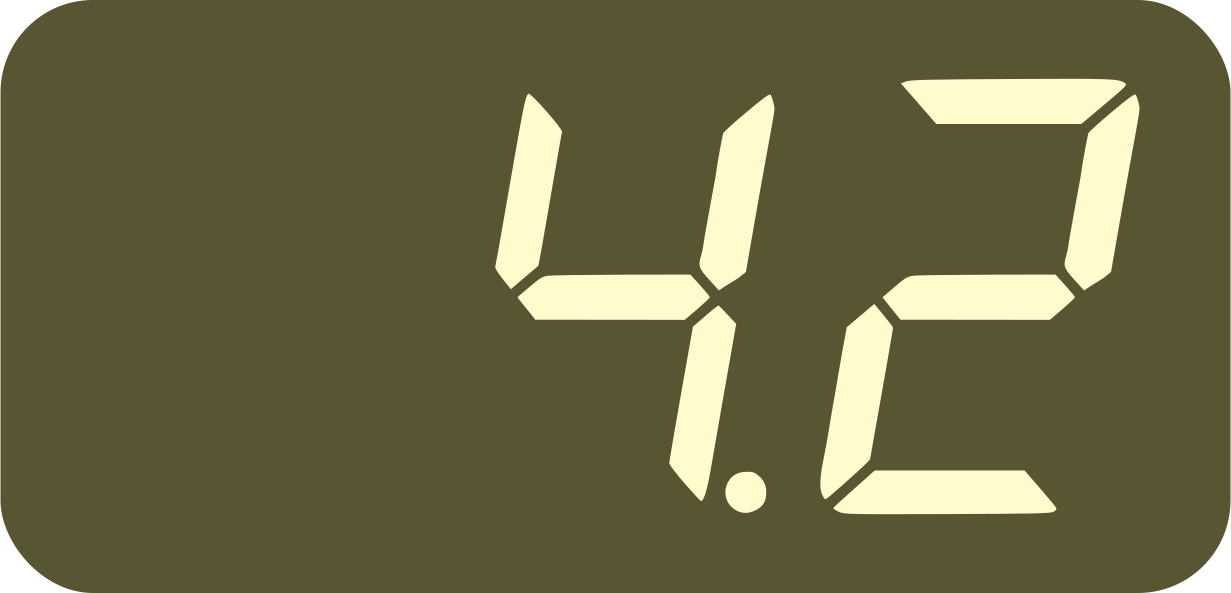 for 4/2
 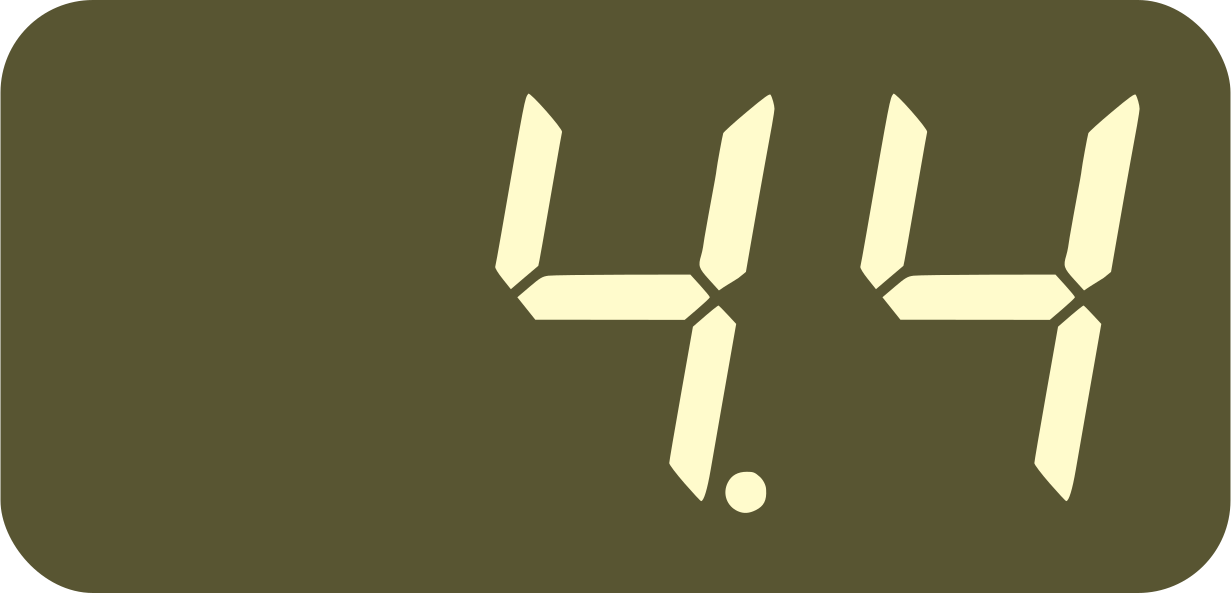 for 4/4 (default)
 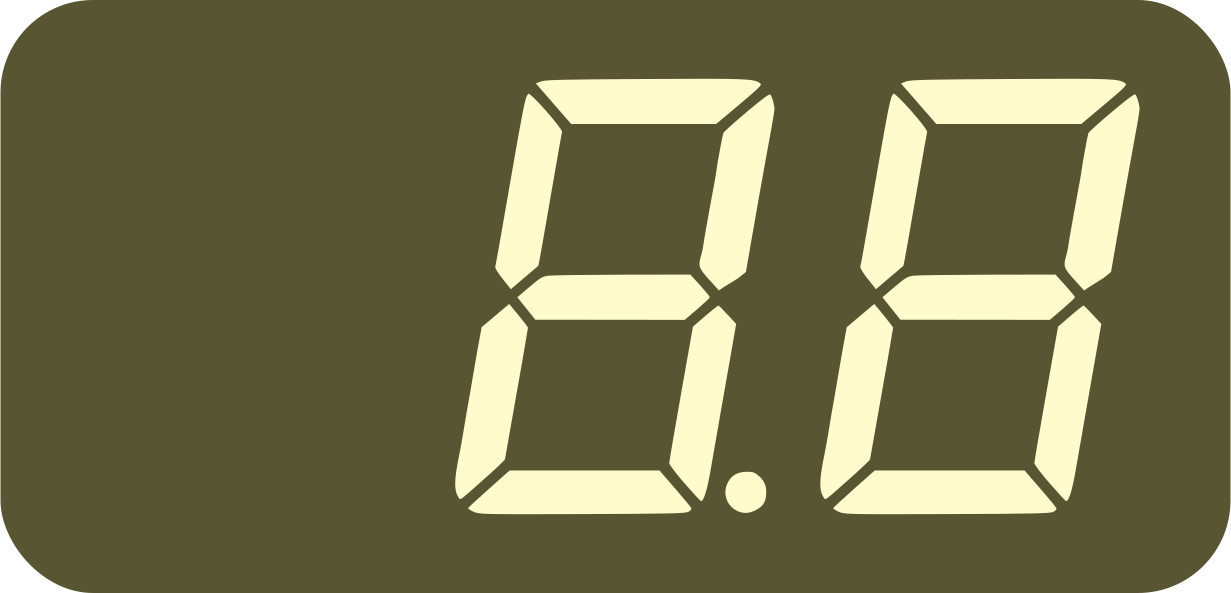 for 8/8
 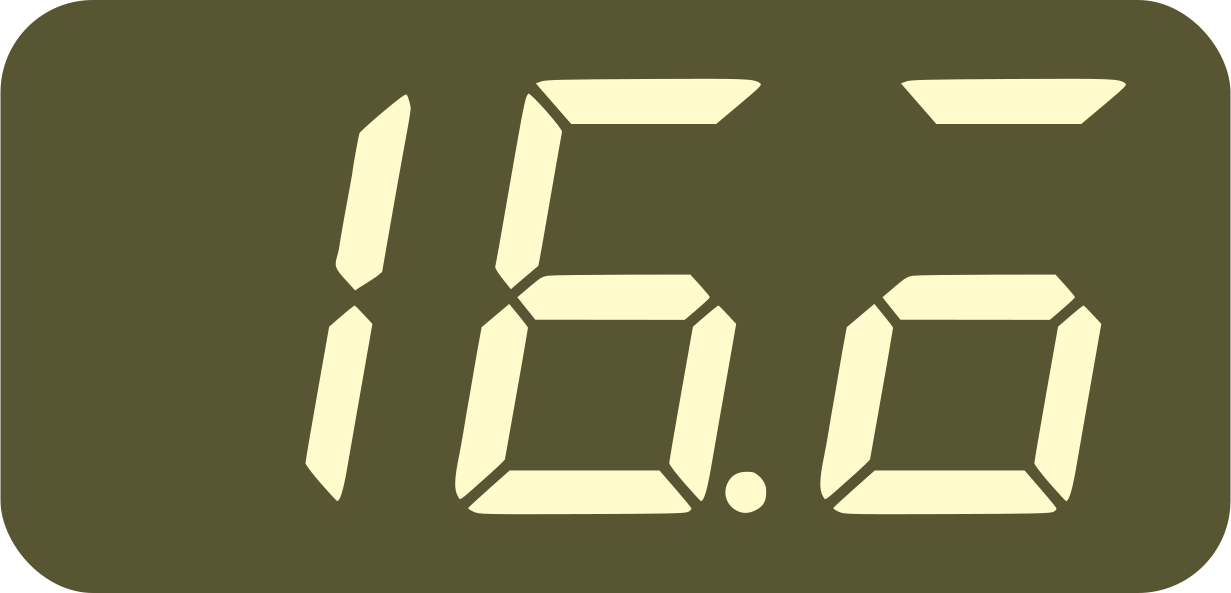 for 16/16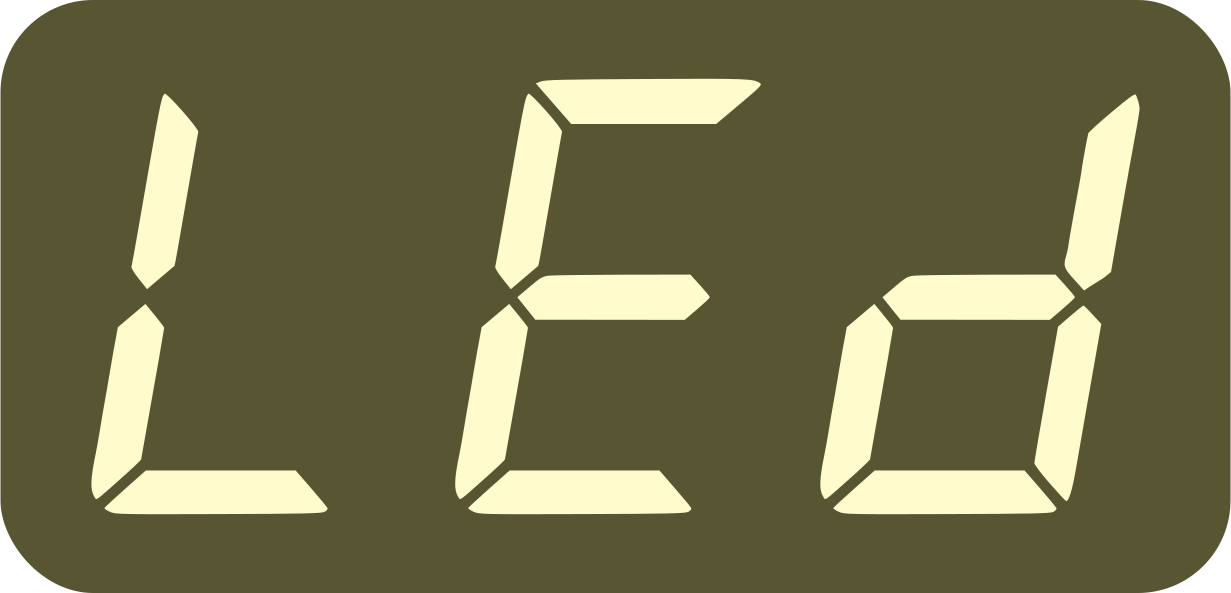
 to
to 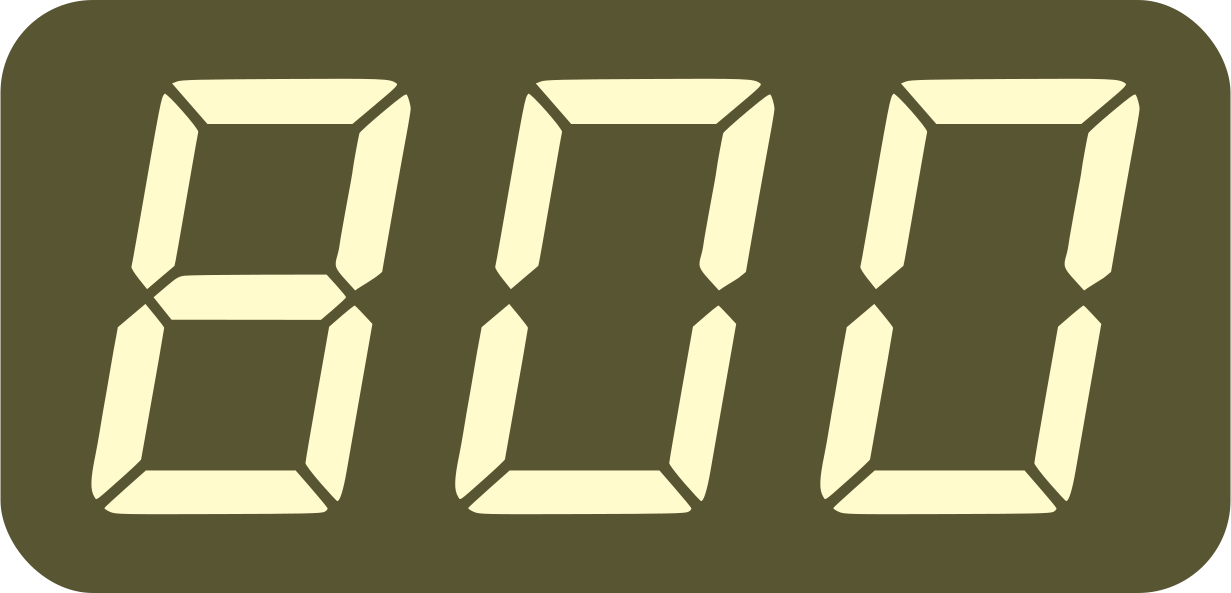 Brightness of the display and all LEDs
(1) When out of the settings, adjust both volumes quickly by holding down the Setup button and turning the Knob.
(2) when selecting 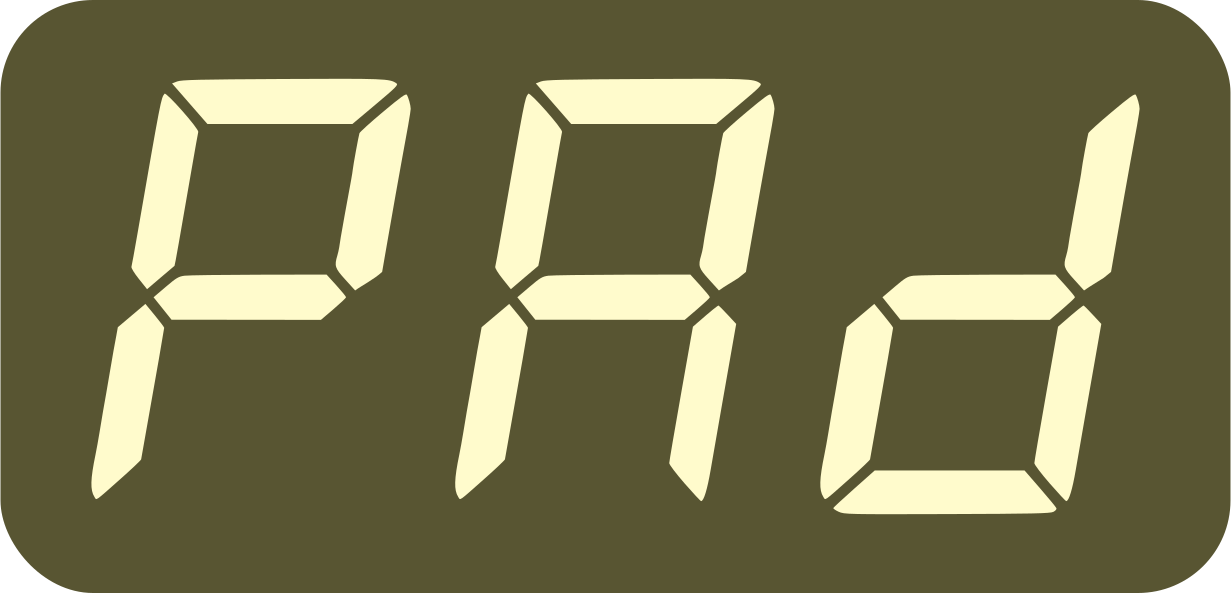 , , or
 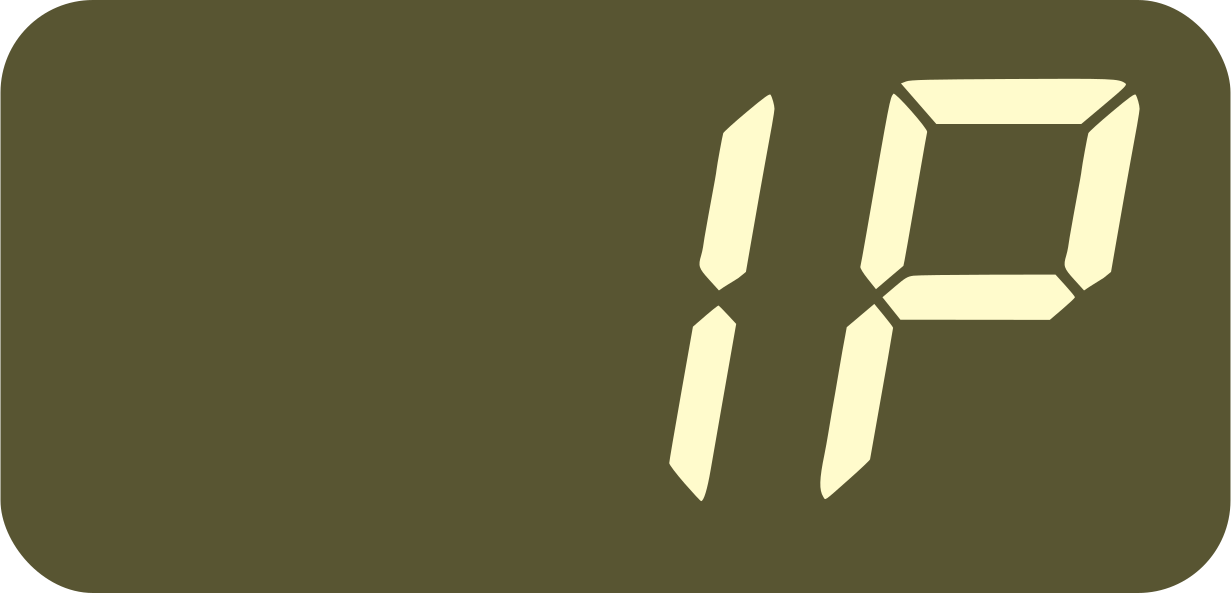 to
to
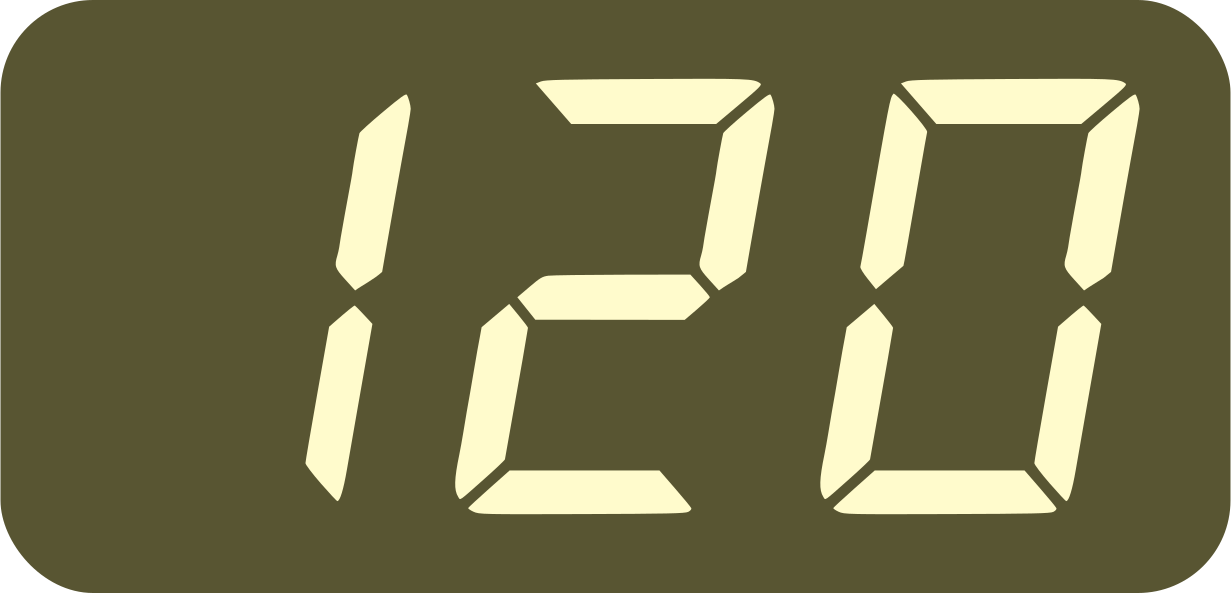 , the tempo LED will stop blinking and react to taps on the
pad, or to input audio/analog pulses. This way you can check the
volume/strength of the input.
, the tempo LED will stop blinking and react to taps on the
pad, or to input audio/analog pulses. This way you can check the
volume/strength of the input.
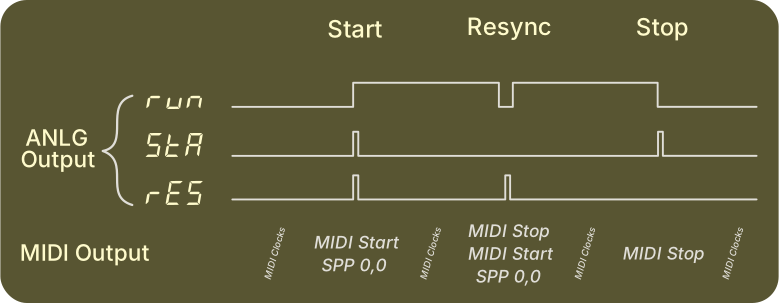
(3) Here is a diagram to better understand those 3 options:
The list of advanced settings
Setting |
Meaning |
Values |
|
Pedal Function (5) |
(changing this will automatically
set |
|
|
|
|
Pedal Type |
|
|
Mute Function |
(great to use when |
|
Reset Mode |
(great to use when |
|
Play button 1 Output |
|
|
Play button 2 Function |
|
|
MIDI Clock Setup |
(when an output is not sending MIDI Clock, the MIDI Start, Stop and SPP messages will not be sent either) |
|
MIDI Output 2 Speed |
MIDI Clock speed divider on MIDI Output 2 From To |
|
Presets Configuration |
See the Tempo Presets section |
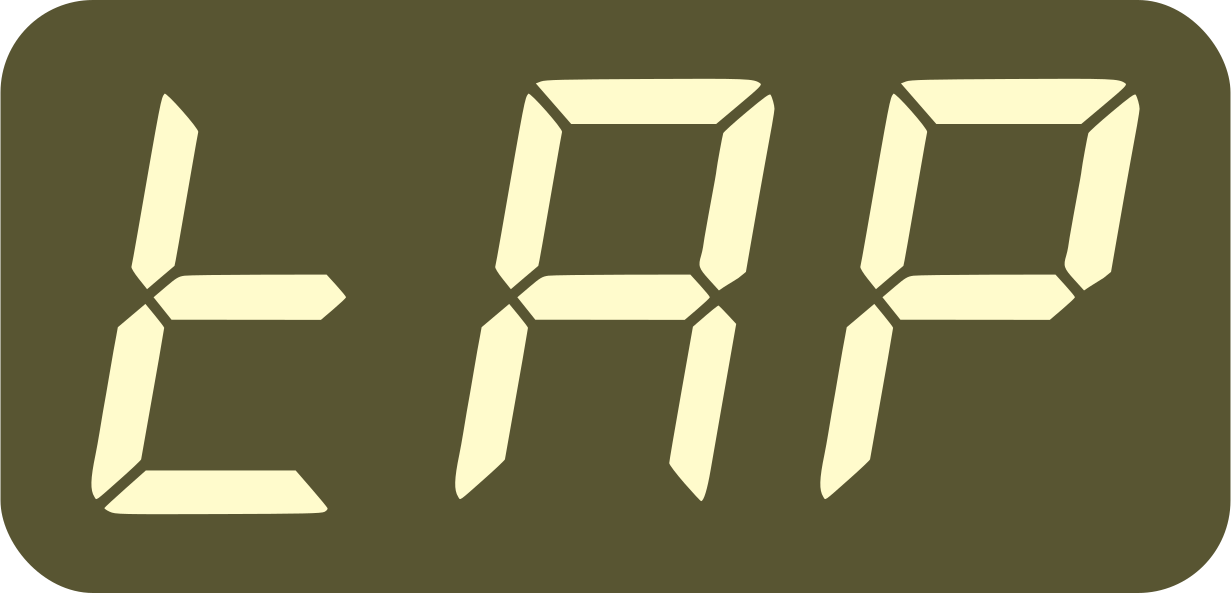 Tap Tempo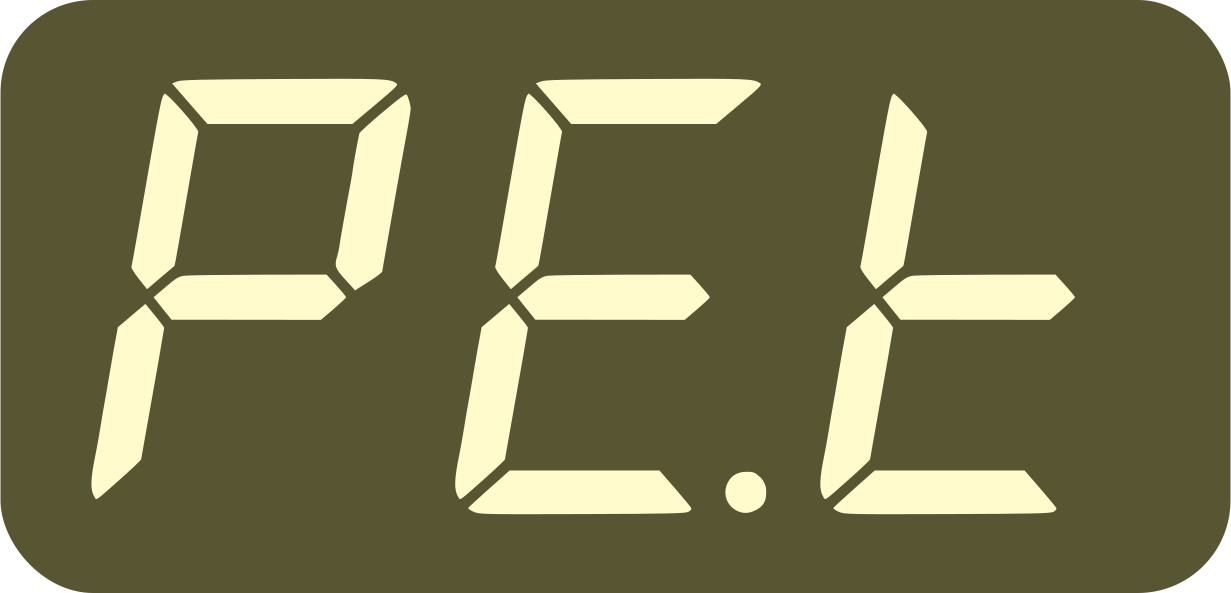
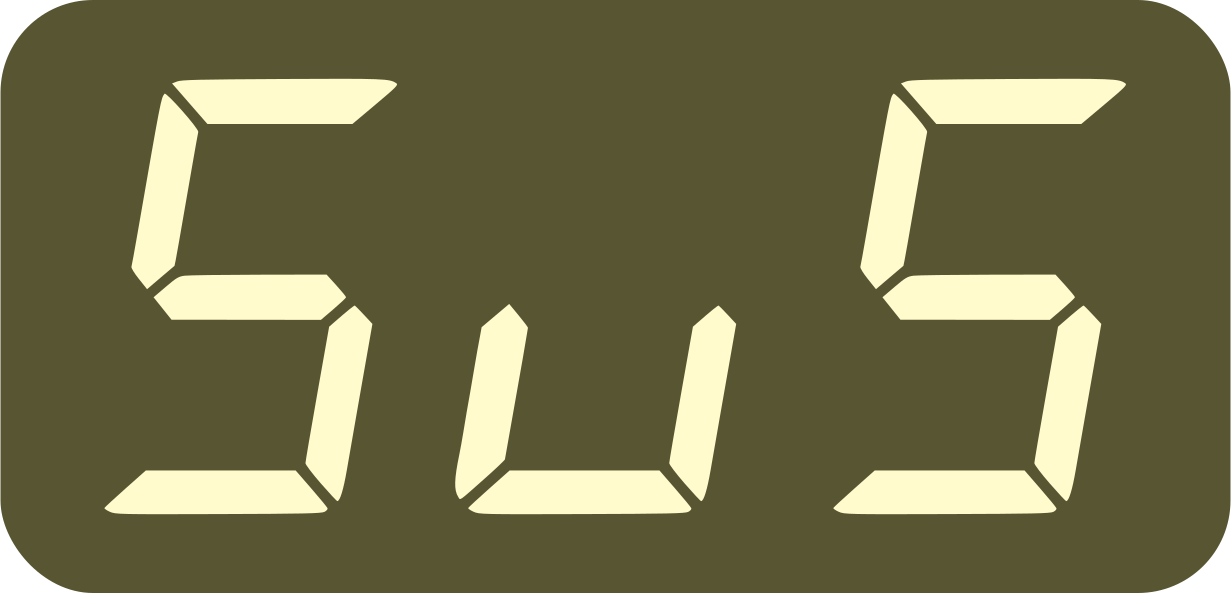 Sustain - use momentary pedals like piano
sustain pedals (default)
Sustain - use momentary pedals like piano
sustain pedals (default)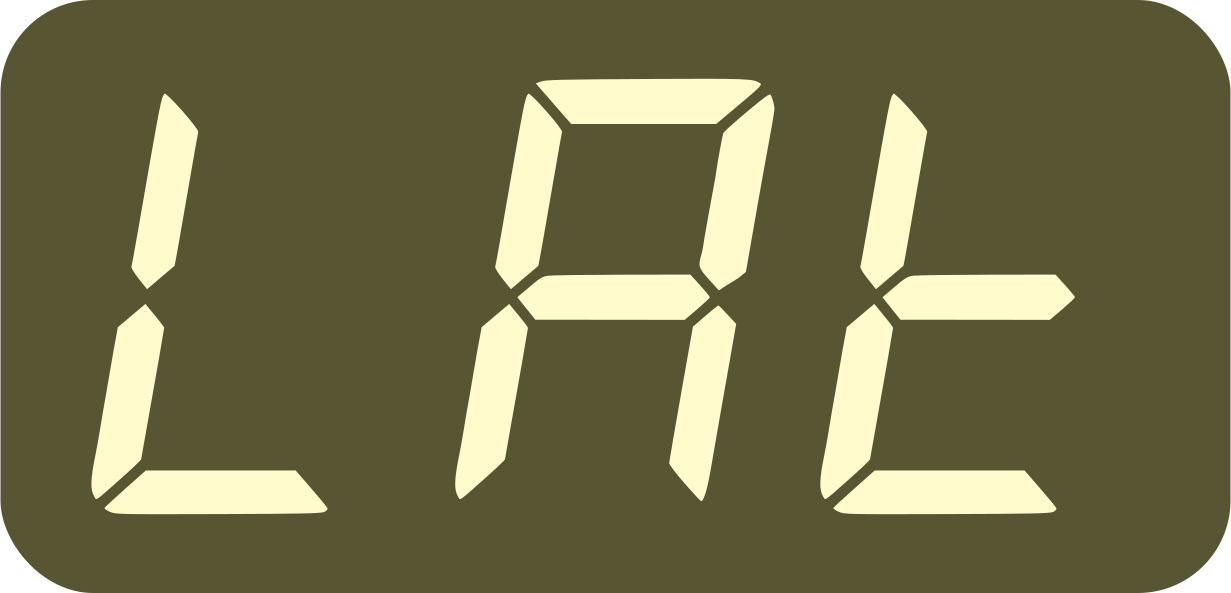 Latching - use latching pedals like guitar
amp footswitches
Latching - use latching pedals like guitar
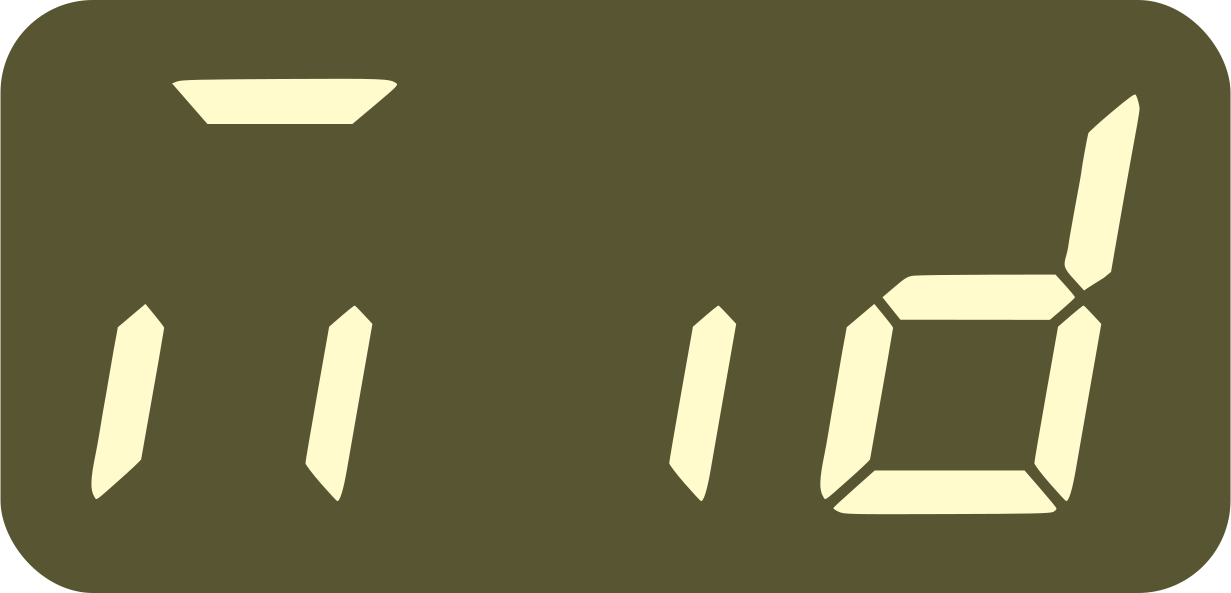
amp footswitches 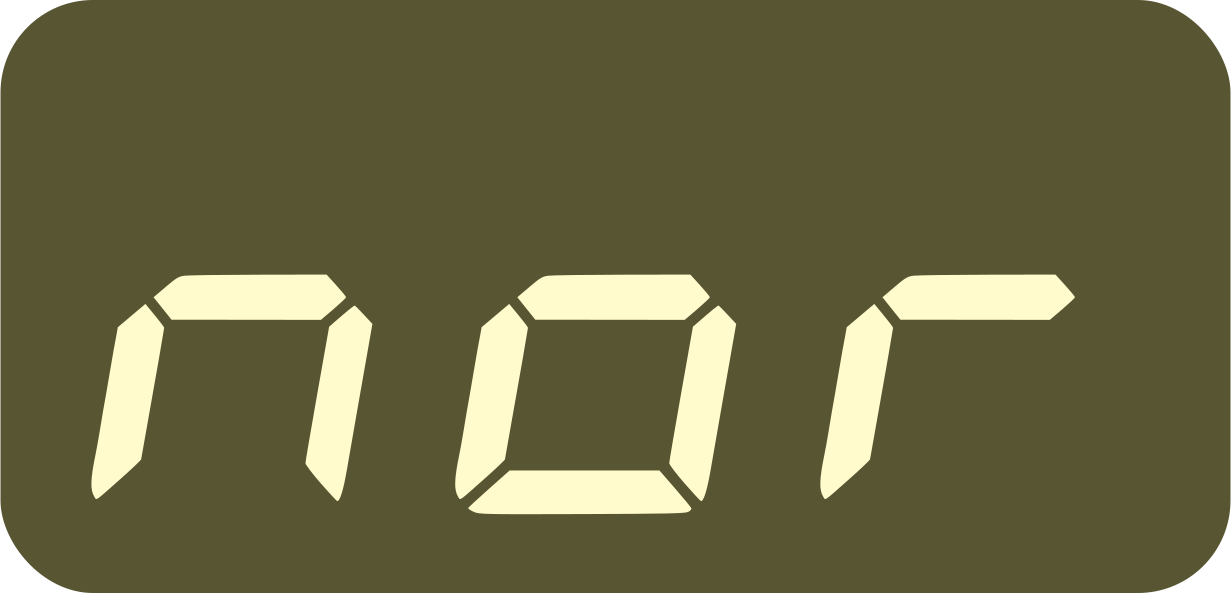 normal behavior, no following (default)
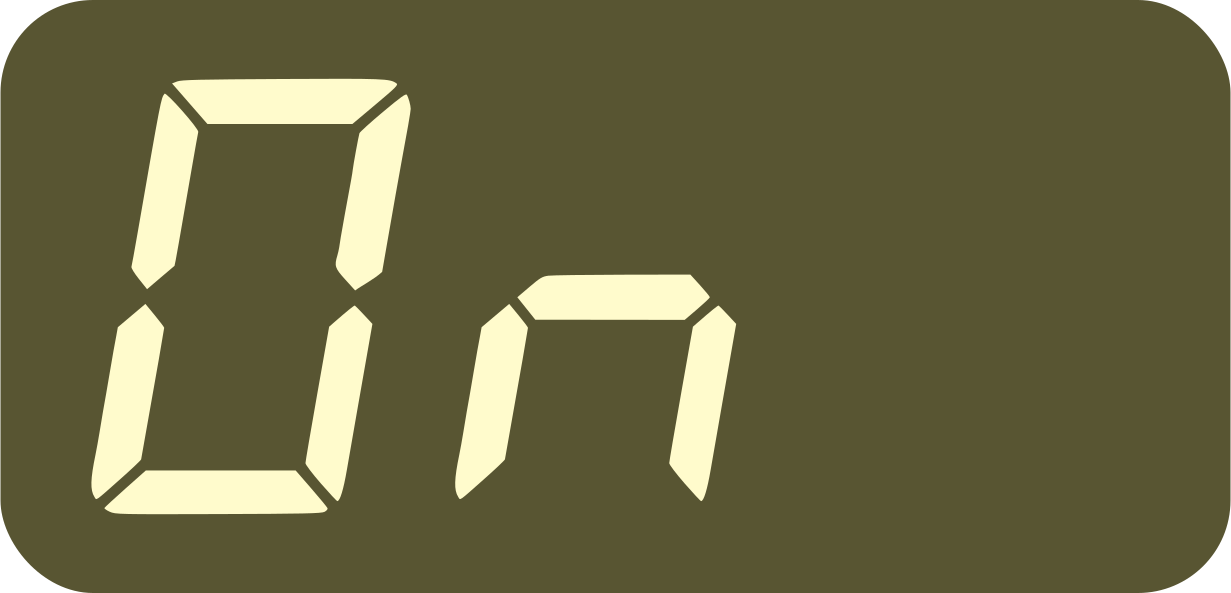 Play is sent right away and the audio metronome
is reset/rewound
Play is sent right away and the audio metronome
is reset/rewound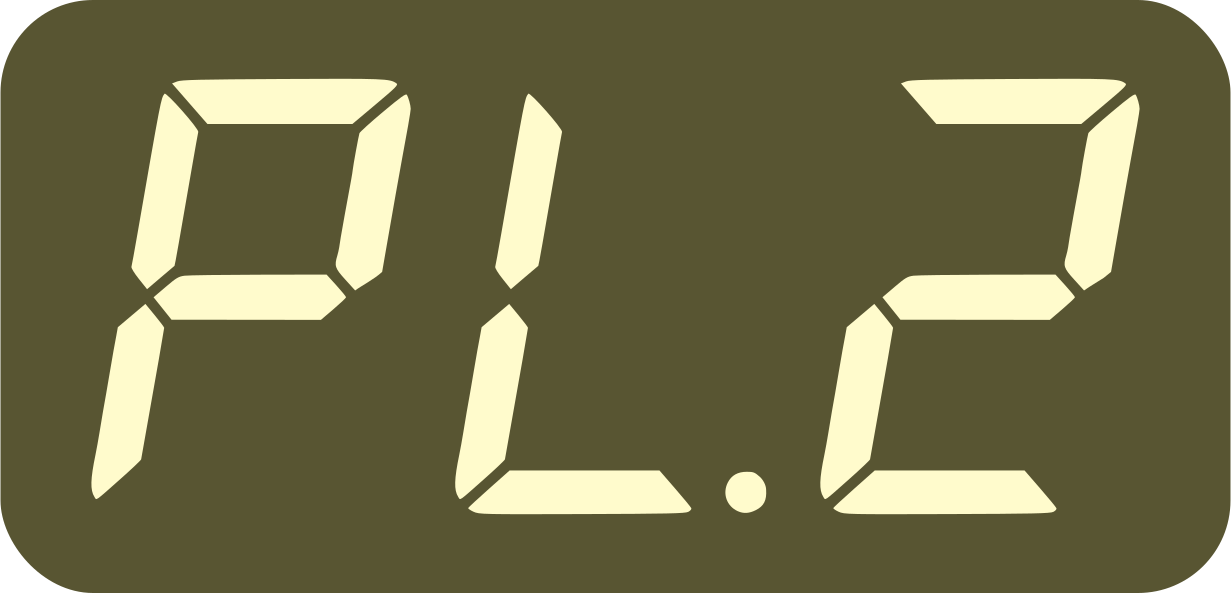
 = 1/8 (clock running at 1/8th of
the speed)
= 1/8 (clock running at 1/8th of
the speed)(1) Pedal 1 configured as act like the play
buttons: short press does start/stop, while a long press does resync.
Using one pedal only will affect the MIDI output controlled by the play
button 1 (i.e. 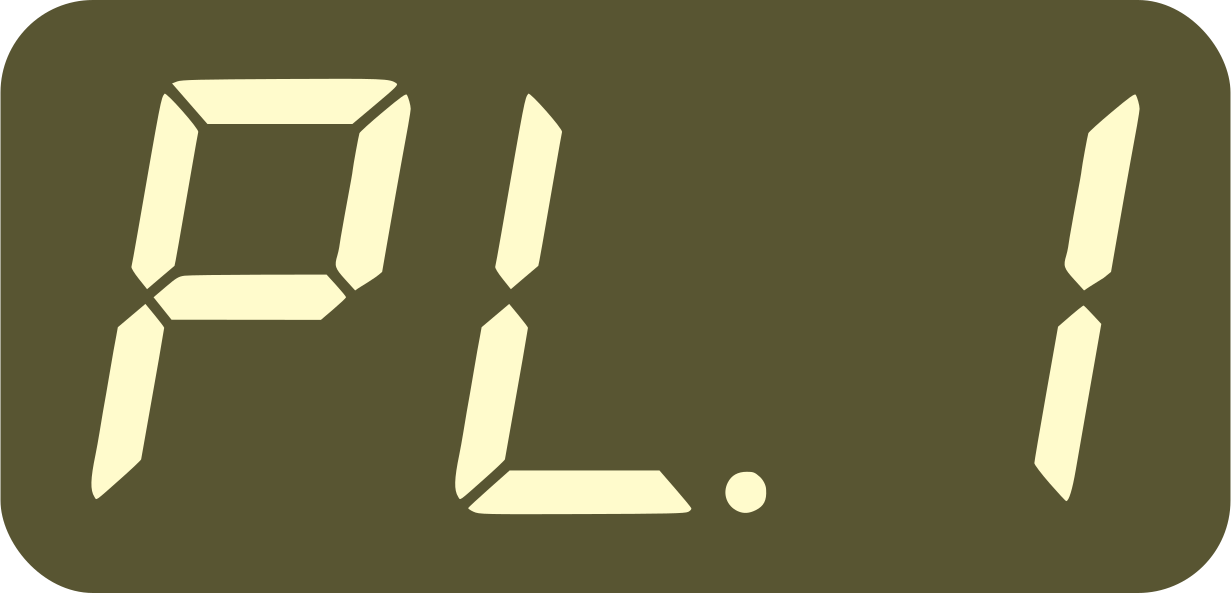 setting). Using two pedals will each control
one MIDI output.
setting). Using two pedals will each control
one MIDI output.
(2) Short press applies the next preset, long press applies the
previous preset.
Or use both pedals, in this case pedal 1 = previous preset and pedal 2
= next preset.
(3) Pedal 2 is the Ring/Right part of the INPUT plug, it can be used in
conjunction with any of the 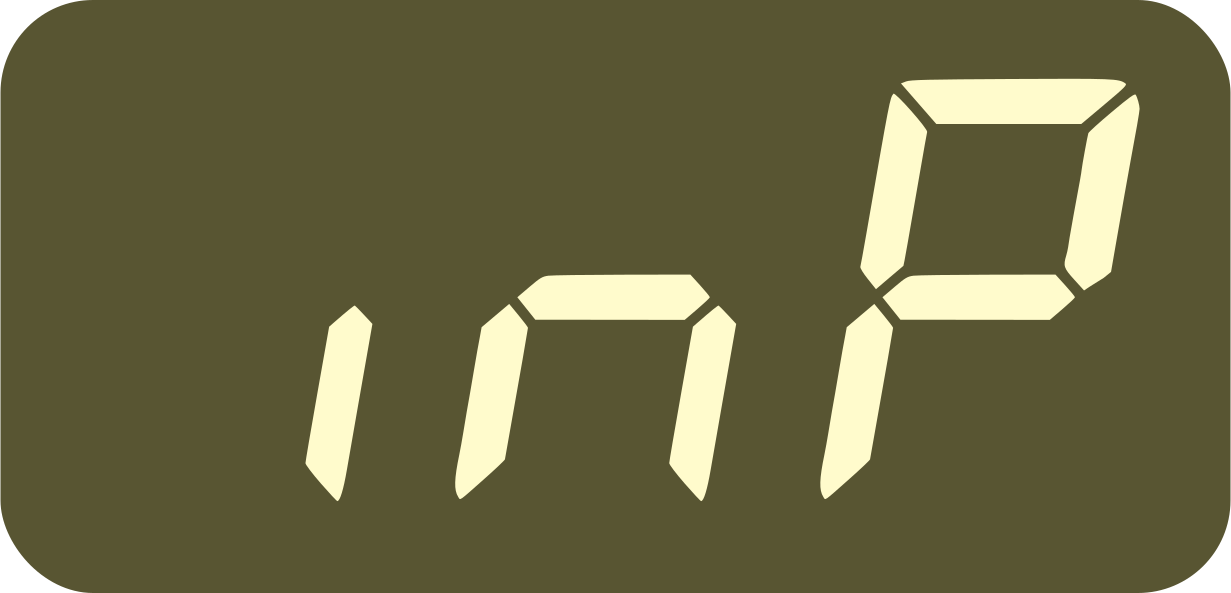 settings. When configured as a single
pedal, long press is disabled, so that you can start your machines
more precisely on the press (and not release).
settings. When configured as a single
pedal, long press is disabled, so that you can start your machines
more precisely on the press (and not release).
(4) When using this option, you can still mute/unmute with a pedal,
MIDI Commands, or by changing the
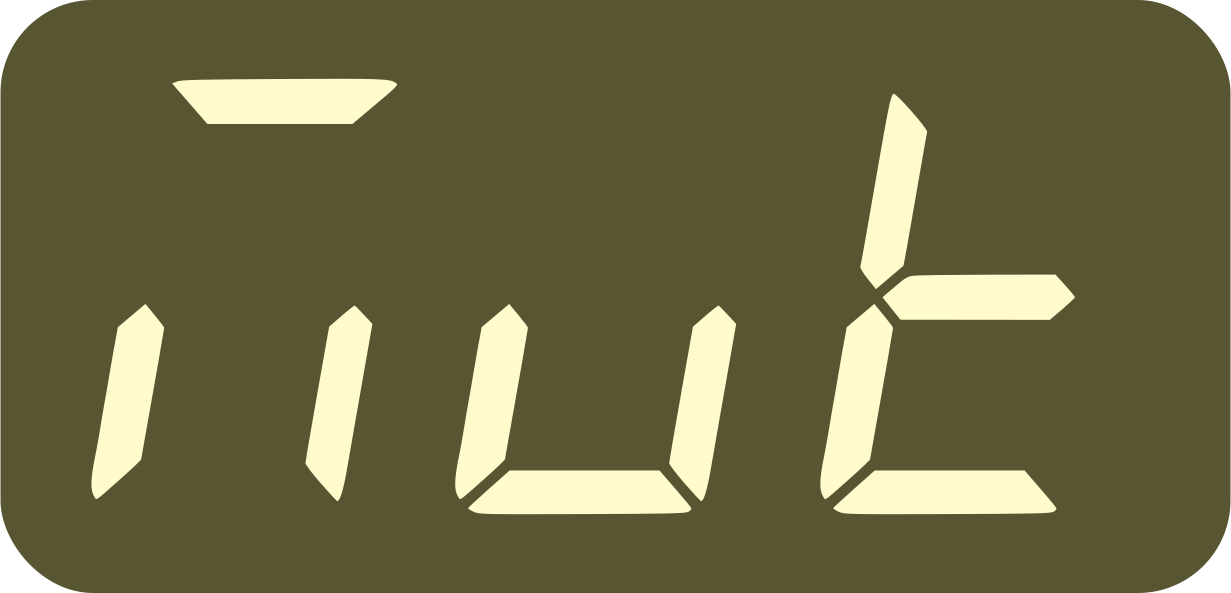 setting to .
(5) The two pedals’ polarity is automatically detected when leaving the settings and when the device restarts. Make sure not to press the pedal at that time.
(6) When count-off is enabled, a double-tap will stop the sequencers / unmute the metronome (depending on the count-off setting).
(7) Latching pedals cannot do a “long-press”, so using such a pedal will not give the possibility to load the previous preset or to resync (for example).
Extra metronome settings
The Nome’s metronome has extra settings that can only be configured using the Sim’n Tonic Config Tool.
These settings are saved on the device just like the others, but are not accessible from the device itself.
Config Tool View |
Setting |
Values |
|
Metronome Sound for Click 3 (8th notes) |
Click sound for 8th notes on the metronome, set to:
|
|
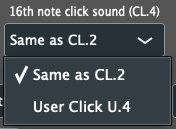
Metronome Sound for Click 4 (16th notes) |
Click sound for 16th notes on the metronome, set to:
|
|
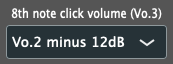
Volume of Click 3 (8th notes) |
Volume of the click 3, set to either:
|
|
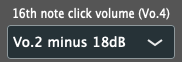
Volume of Click 4 (16th notes) |
Volume of the click 4, set to either:
|
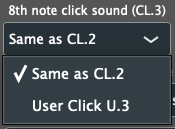
You can also use the same Sim’n Tonic Config
Tool to upload custom user click
sounds for the metronome (i.e.  ,
,  ,
,  , and
, and
 ).
).
Tempo presets
You can save tempo presets directly on the device. There are 50 presets, each preset containing both the tempo and the time signature.
Saving and managing tempo presets
To save and delete presets, find the 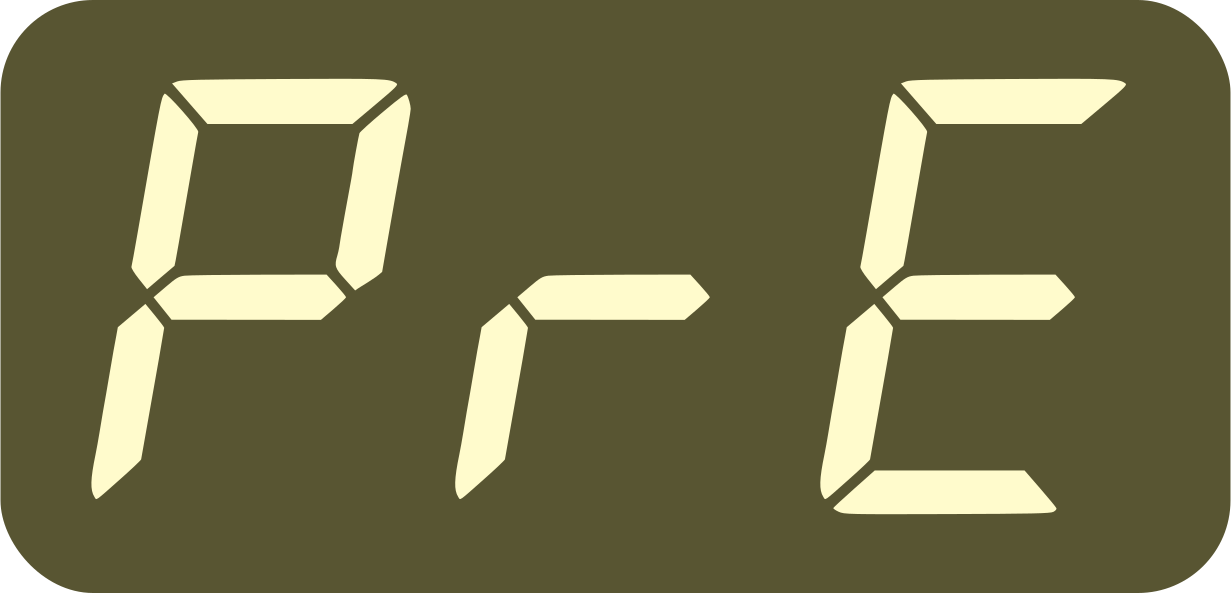 entry in the advanced
settings list:
entry in the advanced
settings list:
→ 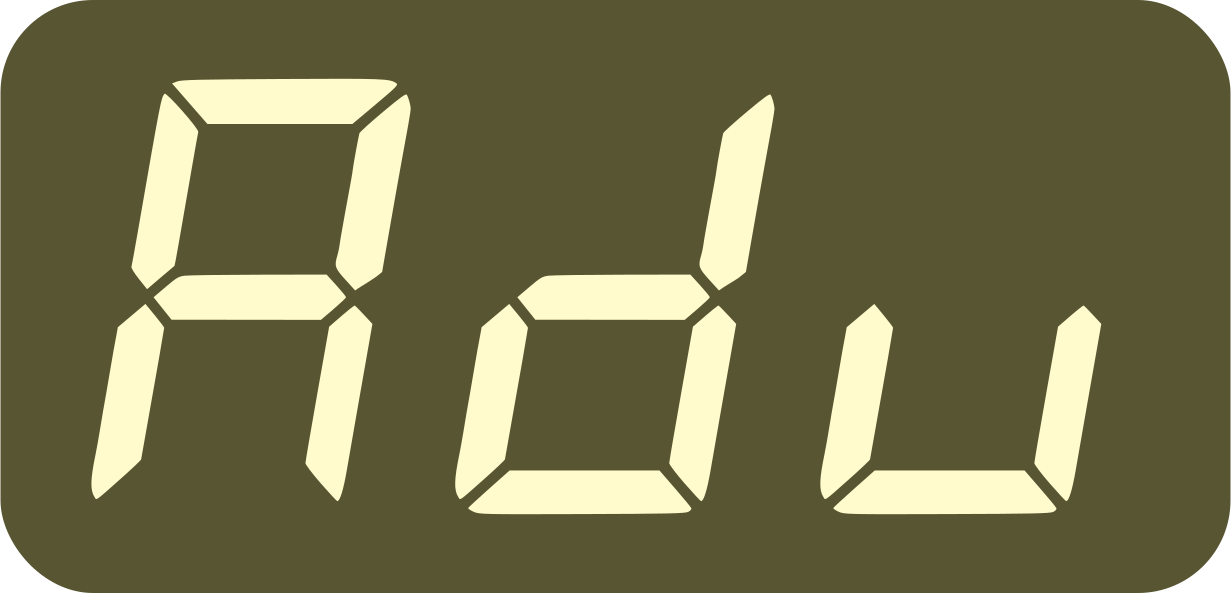 →
→
You will be presented with a list from 1 to X, with X the first available preset (X-1 being the last saved preset).
That preset X will be written as E.xx (E for empty), for example
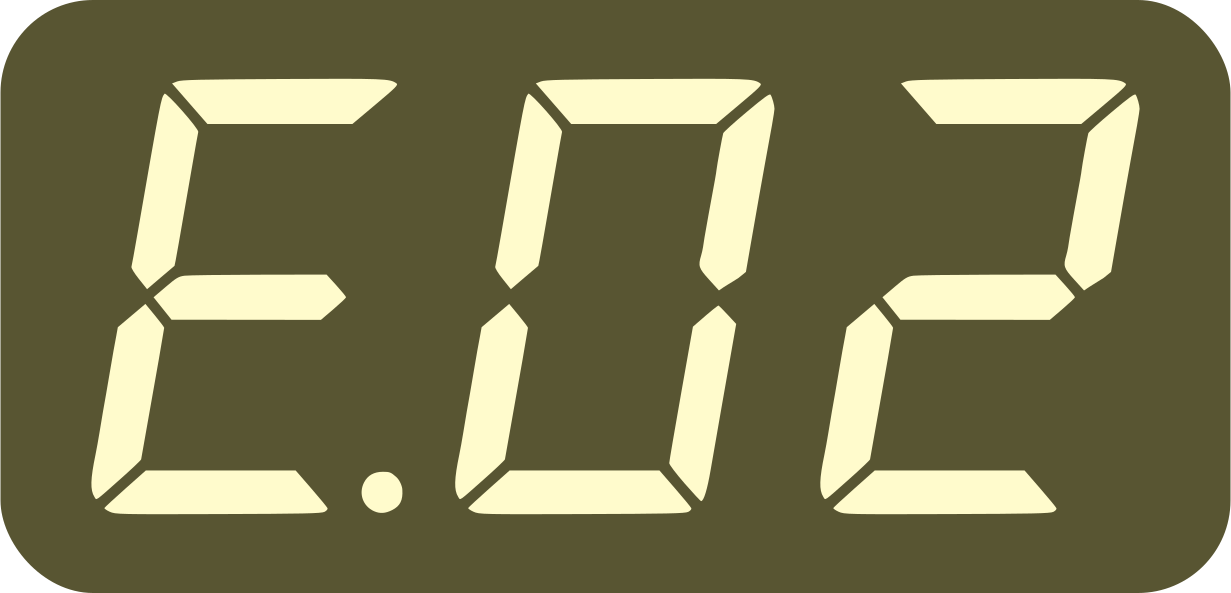 if you have one preset saved already (X=2).
To save the current tempo and time signature as a preset, select the preset you want to save and hold down
The display will show
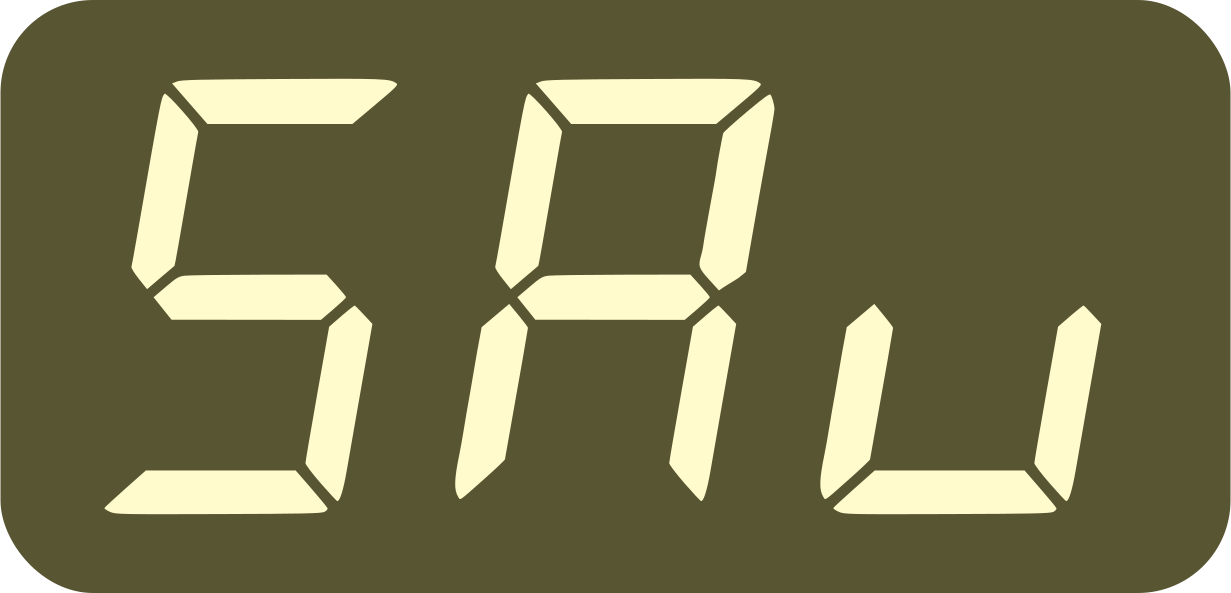 (SAved) when the preset is saved
You can only delete the last preset that was saved (the one just before E.xx).
To delete it, select it and then hold down both
and
The display will show
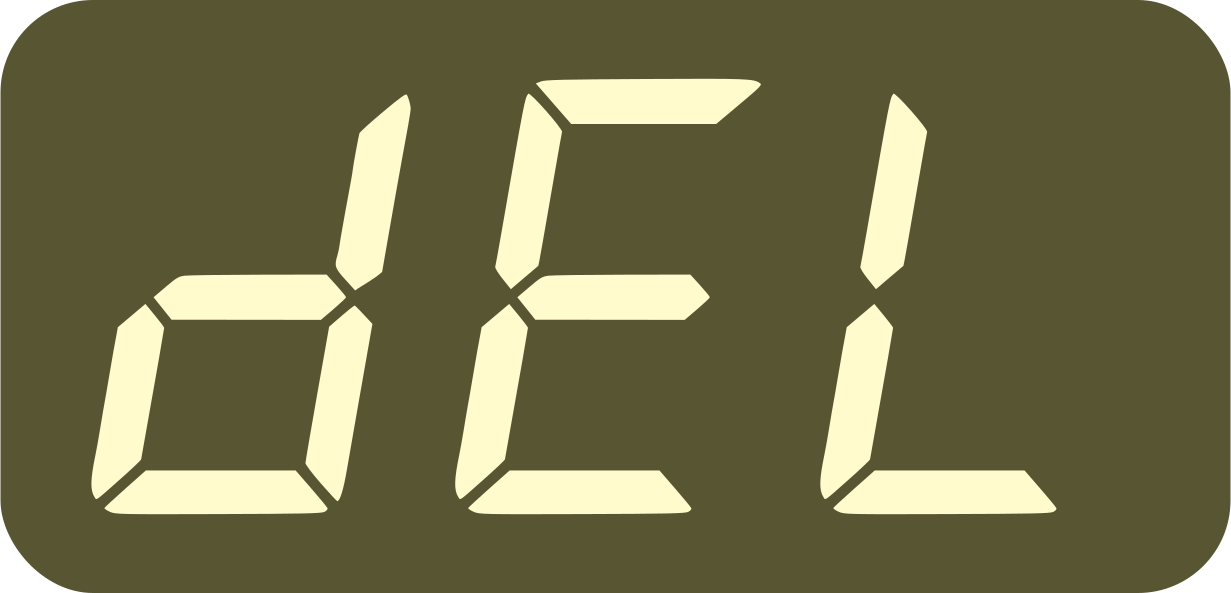 (dELeted) when the preset is
deleted
(dELeted) when the preset is
deleted
To exit the list, either press to go back to the (advanced)
settings list, or press to exit the settings and go back to
the main display showing the tempo.
Applying tempo presets
The last applied preset is always saved in the device.
To see which preset is currently applied, make sure you exit the
settings, then hold and rotate once. The
display will show P.xx, for example 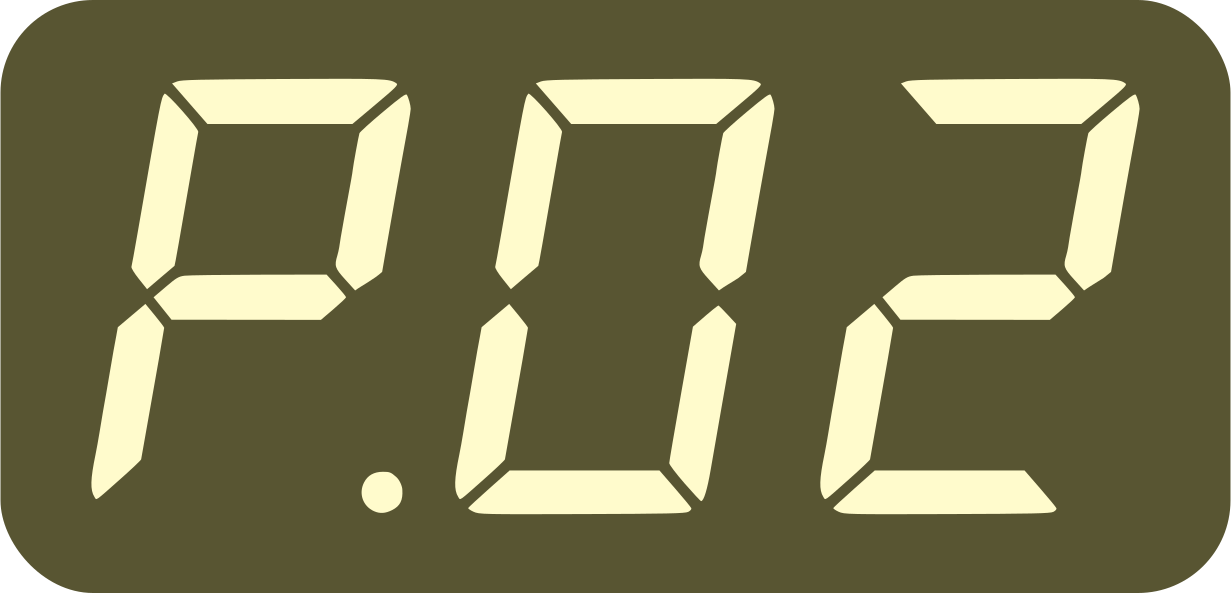 , until you release the
TAP button.
, until you release the
TAP button.
No new preset is applied at this point, but if you keep rotating the knob, the next or previous preset will be applied (and the display will also show you).
When one of the play buttons or is lighting
yellow (i.e. a sequencer is playing), the preset will only be
applied at the end of the bar. The main tempo display will have
blinking dots to indicate that a preset is pending.
When the tempo is in locked mode, the preset will
only be loaded by not applied until is pressed down.
Note that you can also apply presets using pedals or using MIDI commands.
USB communication & commands
The Nome is USB-MIDI Class compliant. It will add 6 MIDI interfaces on your computer.
3 INs:
Nome II Clock [IN] - sends MIDI Clock to your DAW
Nome II DAW Control [IN] - sends MIDI commands to control your DAW
Nome II Module Itf [IN] - forwarded MIDI from the Module interface
And 3 OUTs:
Nome II Commands [OUT] - receives MIDI commands for the Nome
Nome II MIDI Out 1 [OUT] - forwards any MIDI to the “MIDI OUT 1” Jack
Nome II MIDI Out 2 [OUT] - forwards any MIDI to the “MIDI OUT 2” Jack
Note that on Windows the interfaces might be called differently, usually simply “Nome II”, then “MIDIIN2 (Nome II)”, “MIDIIN3 (Nome II)”, and the same for outputs (“MIDIOUT2”, etc). They should be in the same order as written above.
Important: if you recently upgraded the firmware, and cannot see all the interfaces, then you need to delete the Nome Setup registered in your computer, then unplug-replug your Nome. You can do this in the “Audio MIDI Setup” on macOS and in the “Device Manager” on Windows.
The Clock interface
The first MIDI IN interface, “Clock”, sends the MIDI Clock as well Start and Stop messages.
Use it with software or hardware that can follow MIDI Clock, for example it can be a way to get your DAW to follow the Nome.
Do not use this if you are using U-SYNC.
The DAW Control
The second MIDI IN interface, “DAW Control”, is used to send special MIDI messages which you can map on your DAW to do specific actions. This is used together with U-SYNC to control the DAW (only available on certain DAWs - see the U-SYNC documentation)
The module interface
This will be used in the future, for when you connect a physical add-on module to your Nome. For example a MIDI IN module could forward data from its MIDI IN jacks to these interfaces.
MIDI Forwarding interfaces Out 1&2
Send MIDI data to “MIDI Out 1“ or “MIDI Out 2”, and that data will be forwarded to the corresponding DIN-MIDI port on the back of the device.
The MIDI data is merged with the MIDI generated by the Nome so that:
The clock has the highest priority and is 100% unaffected by other data
Start & Stop messages also have high priority and will be sent on time
MIDI System Common messages and MIDI System Realtime messages (which all start with 0xFn) are not forwarded, except Song Select message (0xF3).
All other MIDI messages, including Note On/Off, Aftertouch, CC, PC, Channel Pressure, and Pitch Bend are all forwarded.
System Exclusive (SysEx) messages are forwarded, but limited to 500 bytes. They have lower priority than realtime messages and could be interrupted and resent later if a higher priority message needs to be sent (for example Start).
MIDI Commands
You can send MIDI messages to the USB-MIDI “Commands” interface in order to control or change settings on your Nome.
Important: where a MIDI channel applies, use Channel 12, no other channel will work.
Message |
Value |
Result |
|---|---|---|
Tempo & decimals |
||
CC 85 & CC 86 |
CC 85: 0-3 |
BPM set to (128 × CC85) + CC86 (1) |
CC 87 |
0-127 |
BPM set to 60-187 |
CC 88 |
0-127 |
BPM set to 100-227 |
CC 89 |
0-127 |
BPM set to 140-267 |
CC 110 |
0-99 |
Set tempo decimals, i.e. set BPM to x.00-x.99 (2) |
Time signature |
||
CC 90 |
1-32 |
Set the time signature numerator from 1/x to 32/x |
CC 90 |
101 / 102 / 103 / 104 |
Set the denominator to x/2, x/4, x/8, or x/16, respectively (3) |
Metronome |
||
CC 102 |
0 |
Mute the metronome |
CC 102 |
1 |
Unmute the metronome |
CC 102 |
2 |
Toggle mute (unmute if muted and mute if unmuted) |
ANLG clock speed |
||
CC 104 |
0-109 |
Set ANLG clock 1 speed (4) |
CC 105 |
0-109 |
Set ANLG clock 2 speed (4) |
Tempo presets |
||
Program Change (PC) |
0-49 |
Apply a preset (5) |
Song Select |
0-49 |
Apply a preset (5) |
CC 106 |
1-50 |
Apply a preset (5) |
CC 107 |
1-50 |
Apply a preset right away (5) |
Start/stop sequencers (8) |
||
MIDI Continue |
(Re)start machines on MIDI Port X (6) on the next bar |
|
MIDI Start |
Reset/rewind the clock (7) and start machines on MIDI Port X (6) |
|
MIDI Stop |
Stop machines connected to MIDI Port X (6) |
|
CC 103 |
0 / 1 / 2 |
Same as MIDI Continue / Port 1 only / Port 2 only |
CC 103 |
10 / 11 / 12 |
Same as MIDI Stop / Port 1 only / Port 2 only |
CC 103 |
20 / 21 |
Same as MIDI Start / Port 1 only (7) |
CC 103 |
30 / 31 |
Same as MIDI Start with a 1-bar count-in / Port 1 only (7) |
(1) Send CC 85 first, then CC 86. Examples:
CC 85 value 1 followed by CC 86 value 42, sets the tempo to 170.
Later, sending only CC 86 value 117 (and no CC 85) sets the tempo to 245 (=128+117).
(2) CC 110 changes only the decimal part of the BPM; for example, if currently at
134.53, CC 110 value 27 sets the tempo to 134.27.
Note: CC 86, 87, 88, and 89 all reset the decimals to zero (i.e. set to x.00).
(3) For example, CC 90 value 6 followed by CC 90 value 103 sets a time signature of 6/8.
(4) CC 104 and 105 correspond to the and
settings:
0 =
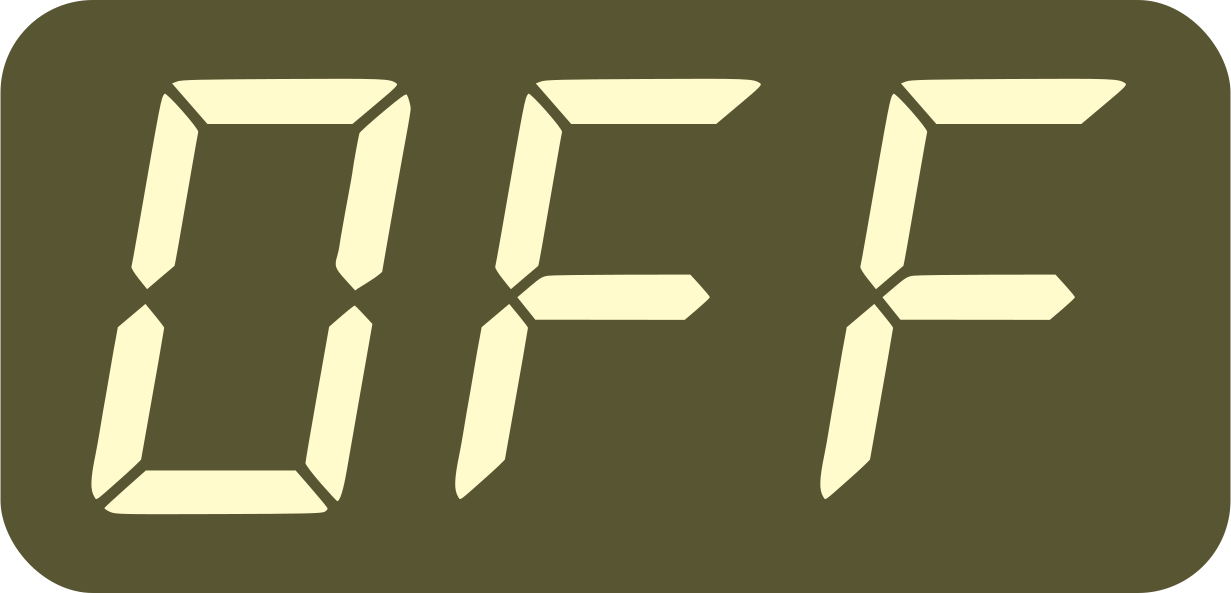
1-8 = “X ppqn”, from
 to
to 
9-11 =
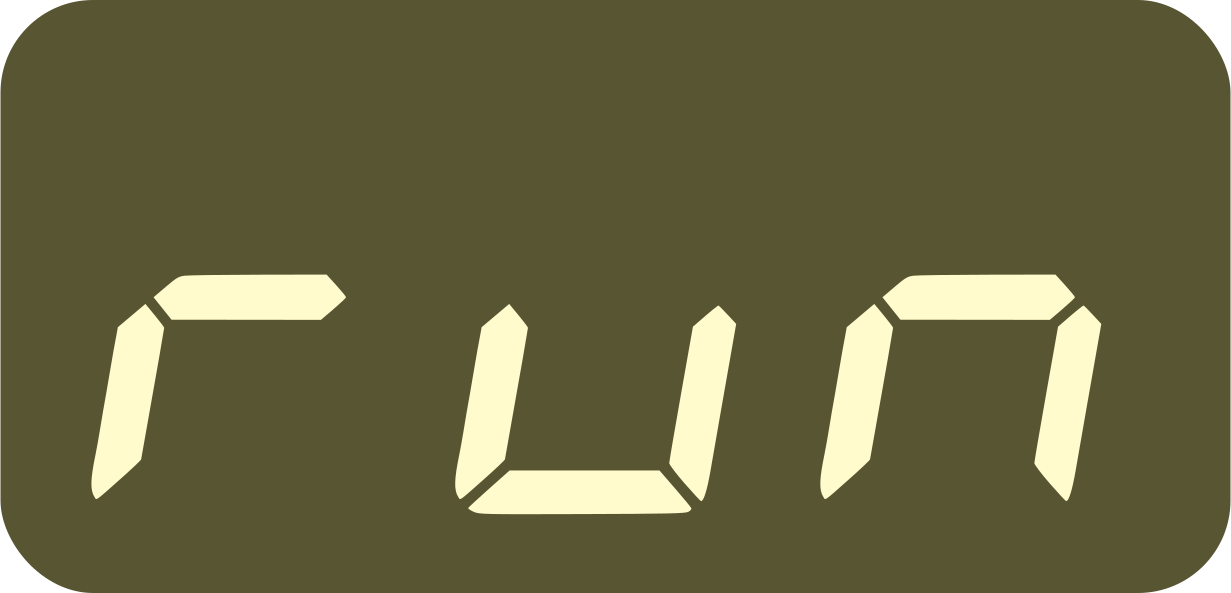 ,
, 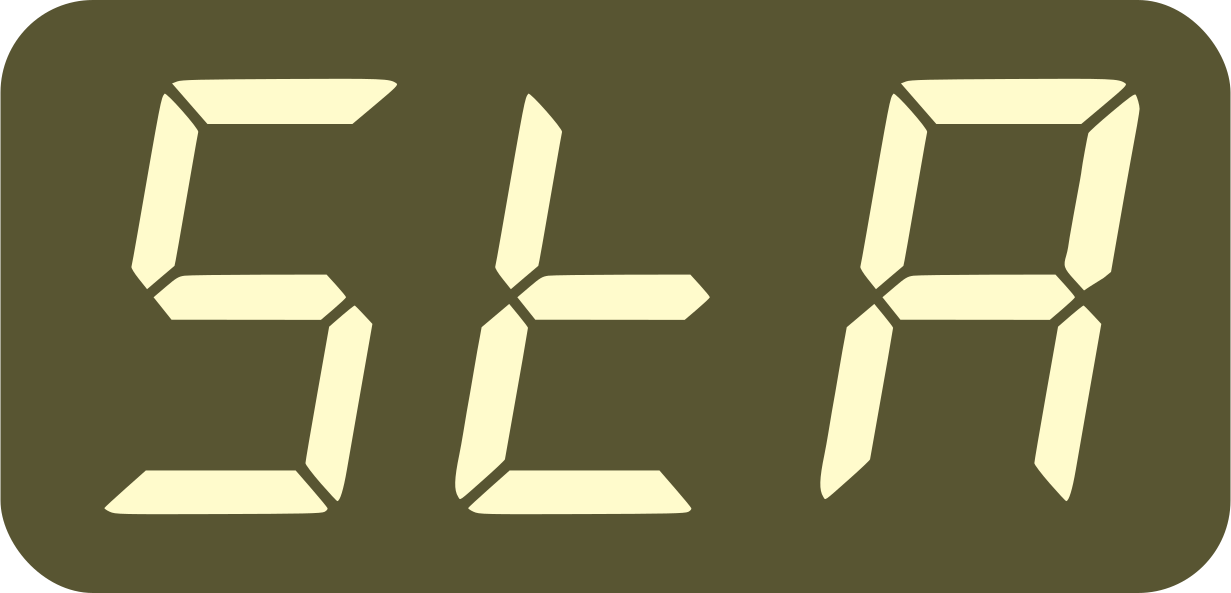 , and
, and 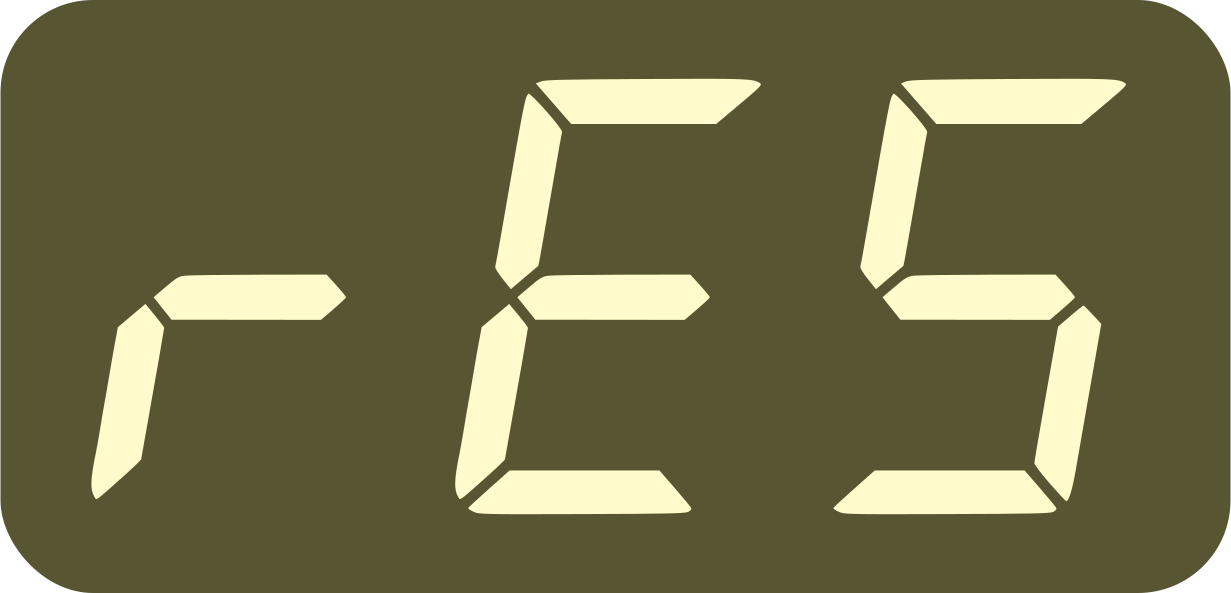 ,
respectively
,
respectively12-109 = “X beats”, from
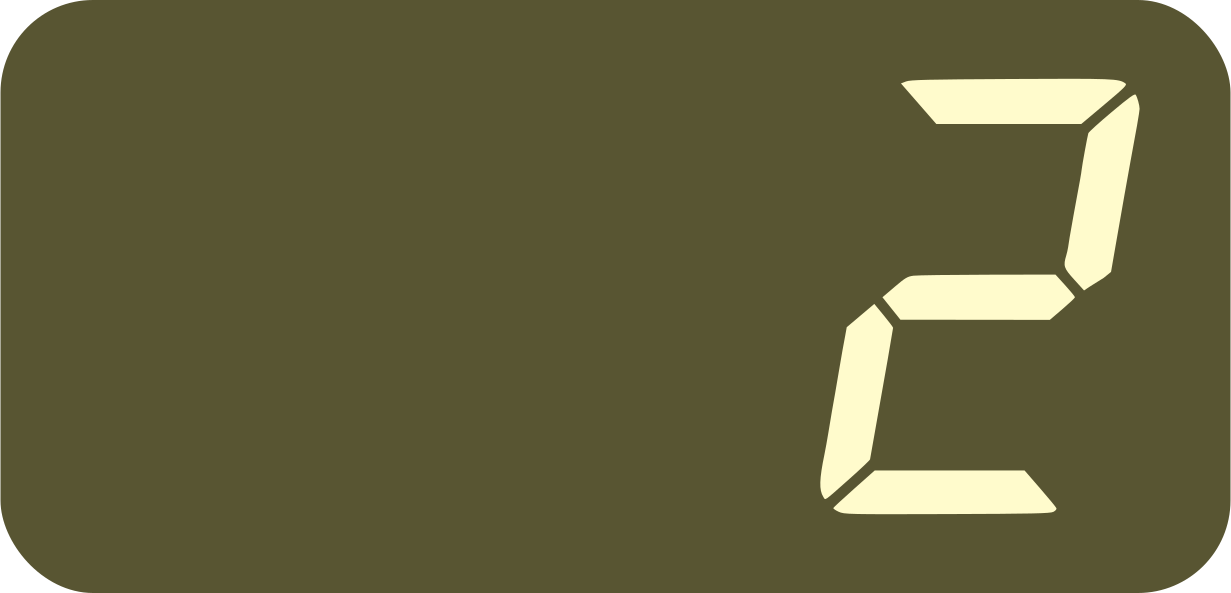 to
to 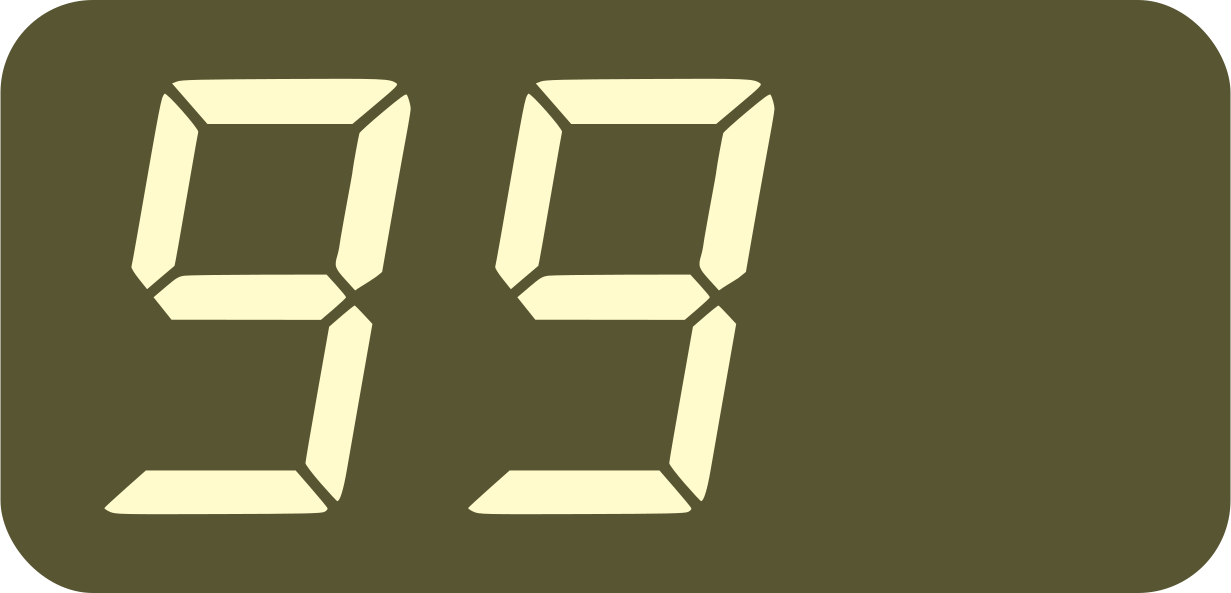
See the list of basic settings for more details.
(5) MIDI CC 106 and Program Change wait if the Play button is lit or the device is in Locked Mode, as when applying a preset on the device or with a pedal. CC 107 bypasses this and applies the preset right away.
On devices/software, CC values usually start from 0, while Program Change and Song Select start from 1. Whichever message you use, the number shown on your device should match the preset number.
(6) Port X is the MIDI output port selected by the
setting (both or output 1 only).
(7) This is independent of the rES setting. But no resets or count-in are possible when syncing to an external clock (24P mode or U-SYNC, for example).
(8) Start/stop commands act regardless of the current playing state
and device configuration, including the and the settings.
This means MIDI Stop can stop a sequencer
started manually, and MIDI Continue can send a resync (the equivalent of
holding down the Play button).
To avoid conflicts with DAW transport messages, MIDI Start/Continue/Stop are disabled when the device is both connected to a U-SYNC plugin and using auto-play. MIDI CC commands, including CC 103, are always enabled.
Sync to other devices & DAWs
The Nome has been designed to be used as a Master Clock, and if you can you should always let it be the master. But there might be some situations where this is not possible, this section is about how to get your Nome to follow another device.
Sync to an analog clock or an audio signal
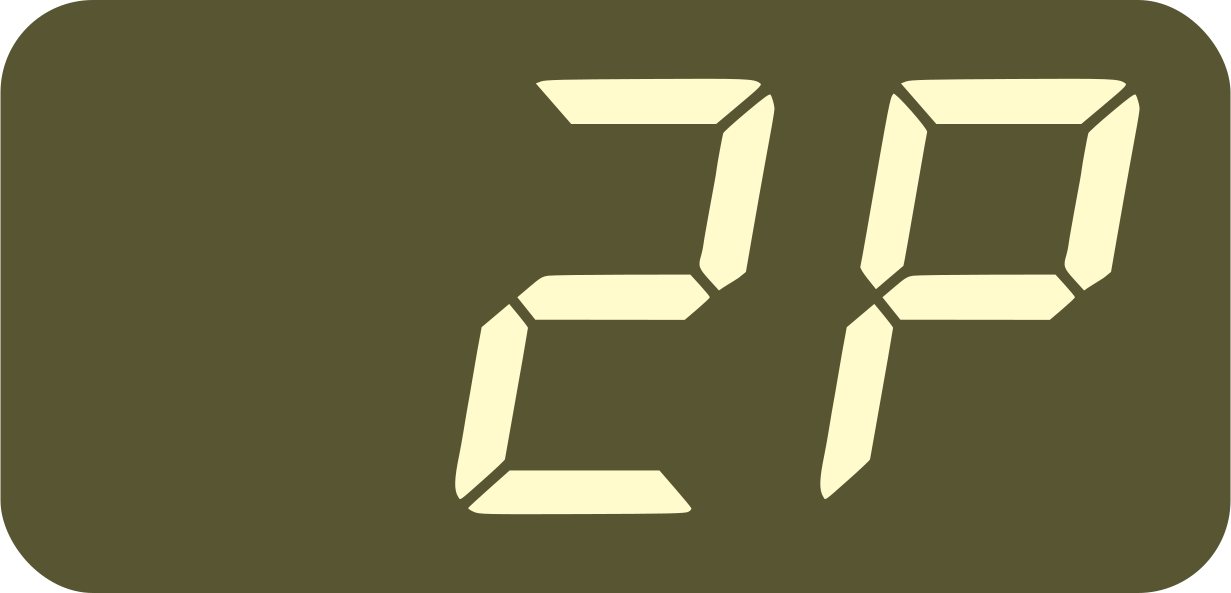
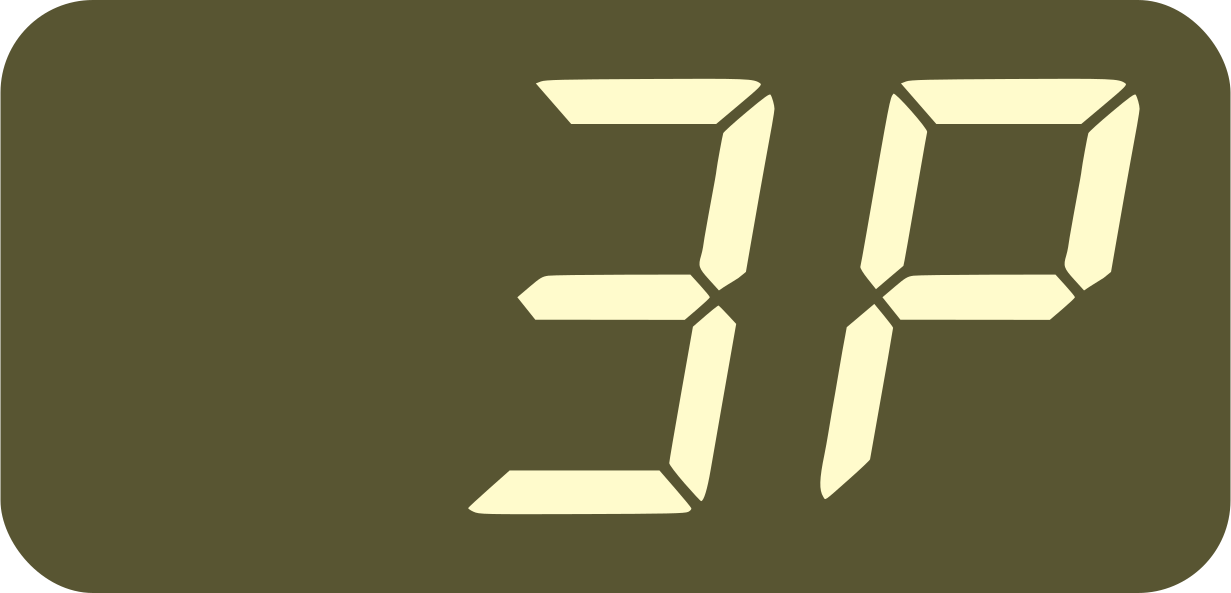
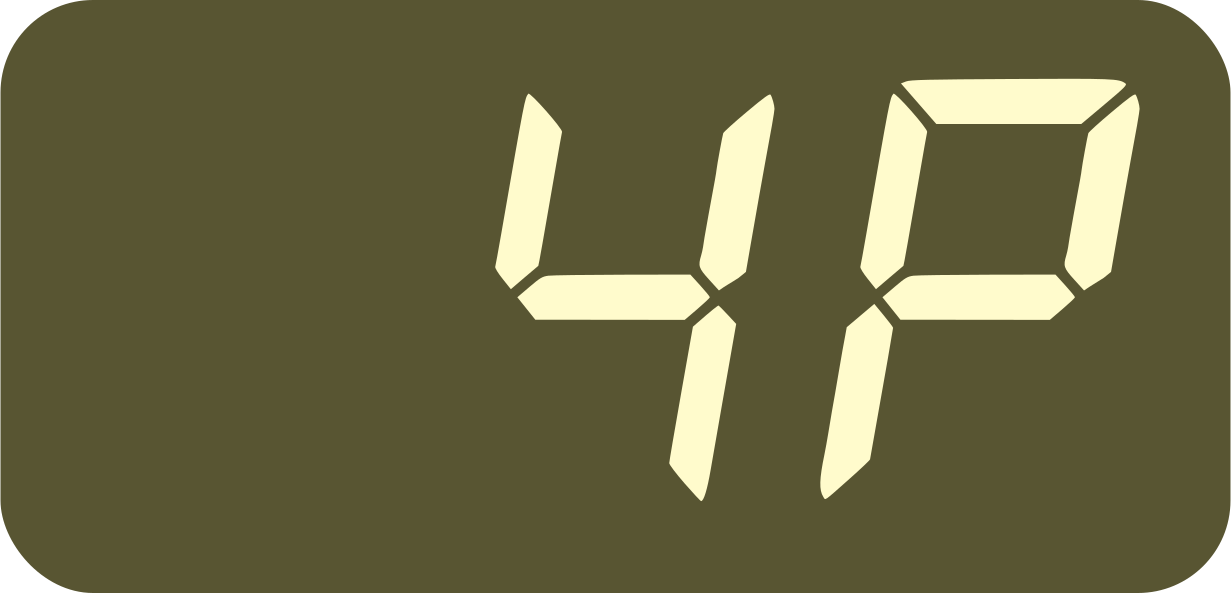
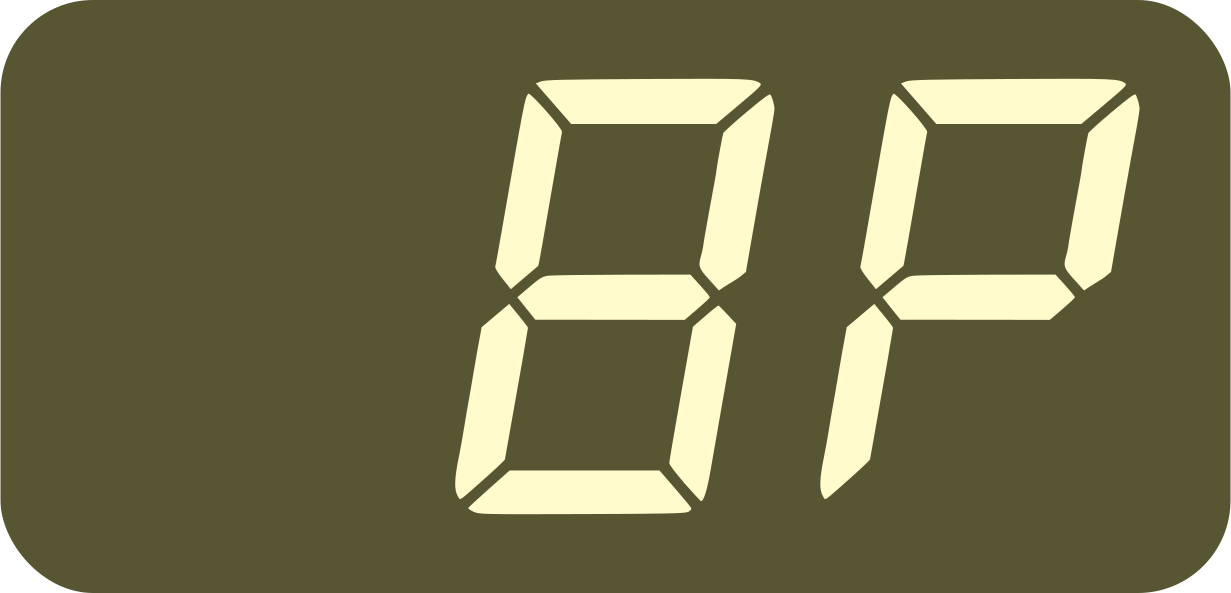
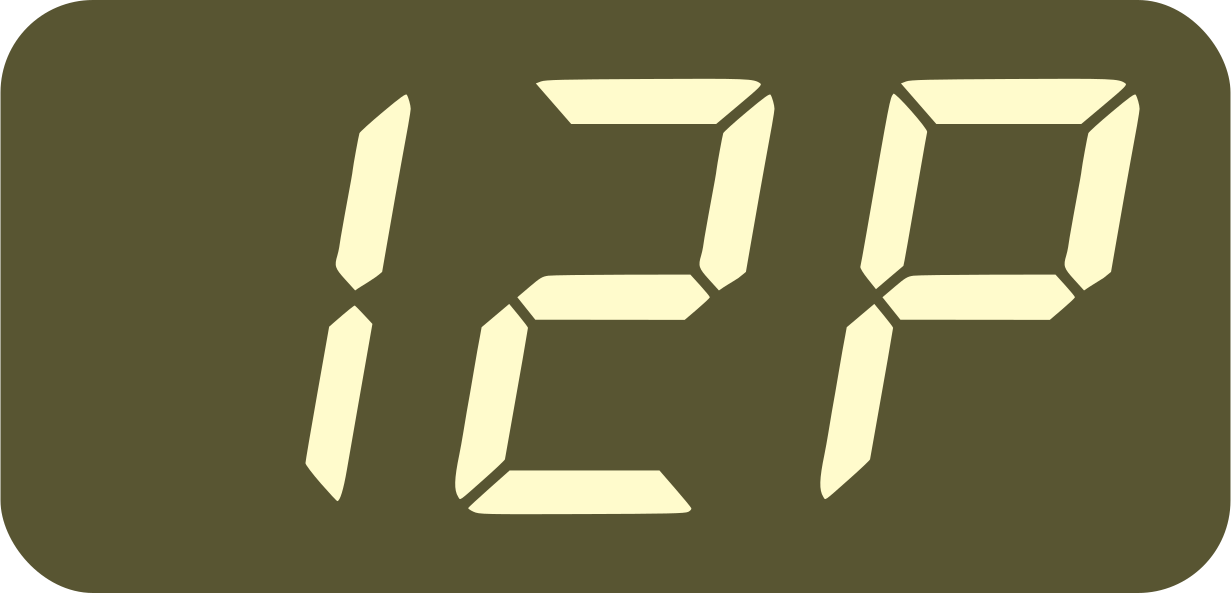
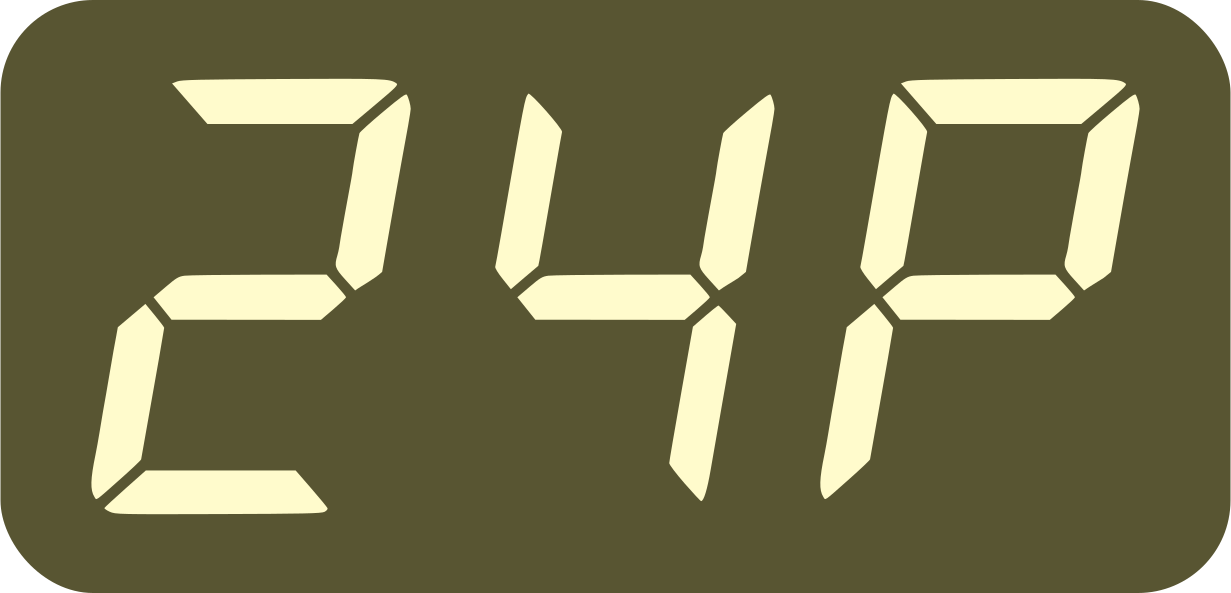
Setting the → setting to one of the 1P to
24P values will get your Nome to follow an analog or audio signal
sent to the “INPUT” jack of the device.
The analog sync signal can be any loud short sounds or analog pulses sent at X ppq (parts per quarternote). This could be for example a recorded sound sent regularly or a 5V analog clock like the ones sent by modular or vintage synths. The available signal speeds X (in ppq) are the following:

Make sure the pulses are sharp and short, otherwise one pulse could be counted as two.
This is a great way to get the Nome to follow a machine without MIDI, for example a tape machine, a hardware recorder, a DJ turntable, an SPD Drum pad, a piece of software, etc.
Important: the Nome cannot sync to any audio, usually called “Beat Detection” or “Tempo Following” (for example sync to a song or live audio). The Nome will only sync to regular pulses.
Syncing to your DAW with U-SYNC (Mac)
Sync your Nome and your DAW with our innovative U-SYNC technology. All you need to do is download U-SYNC, install it, and load the U-SYNC plugin on your DAW.
See also the U-SYNC Manual and the U-SYNC Quick Start Guide
Note: for now, U-SYNC is only available on Mac. On Windows you will have to use the 24P mode and the old plugin.
Syncing to your DAW using the 24P mode (Windows)
If you are on Windows, or if your DAW does not work with U-SYNC, you can sync using the “Midronome” plugin. This plugin sends analog (audio) pulses at 24ppq, so that the Nome can sync to it like it would to an analog clock for example. It works with both generations, Nome I and Nome II (despite its name).
Note: this “Midronome” plugin is open-source. Feel free to report or even correct any bugs on its github page. You can download the VST/AU/AAX files on the github page.
Once you have the plugin installed:
Load the plugin on a track in your DAW
Then configure your DAW and your audio interface so that this track is routed to a dedicated (physical) output on your audio interface
Make sure that only this track is sent on that output
Make sure the volume of that output is loud is loud
Connect a cable from this output to the Nome’s “INPUT” plug
Enable the 24P mode on the Nome
Then press play in your DAW, the Nome’s “SYNC” LED should turn on and it should follow your DAW’s timing.
For more information about how to set up the old plugin, see the old PDF for FW 2.0 called “How to sync with DAWs”, also on the github page.
Syncing your DAW to the Nome using MIDI over USB
U-SYNC and the 24P mode will get the Nome to follow your DAW (i.e. the DAW is the master), but you might prefer it the other way around, getting your DAW to follow the Nome (i.e. the Nome is the master).
The Nome sends MIDI Clock over USB, which you can use to sync your DAW to it. Please refer to your DAW’s documentation regarding how to do this. For example, the “Syncing Live to another device or application” section in the official Ableton documentation describes how to set it up for Ableton.
Most DAWs have a setting to adjust the synchronisation delay, see your DAW’s documentation regarding this as well. As of today, only Ableton, Bitwig, FL Studio, and Reason can do this
Automatically start and stop sequencers
The → setting makes the device
automatically “press” a play button when the sync starts and stops.
Set this setting and the Nome will automatically send Start/Stop
on its physical MIDI Outputs ports when the sync starts and stops,
whether it’s syncing to a DAW
or to an analog/audio signal (sync to
1-24ppq, i.e. 1P -
24P settings).
You can choose which of your machines should start automatically:
- machines connected to both MIDI Output 1 and 2
- machines connected to MIDI Output 1 only
- machines connected to MIDI Output 2 only
As with everything else, the Analog Outputs 1 (left part of the ANLG plug) and 2 (right part) follow the respective MIDI outputs, so they will also be affected by this setting.
Note that:
when syncing multiple Nomes together, this setting also affects the follower Nomes react to pressing play on the master Nome.
when the count-off setting
→ 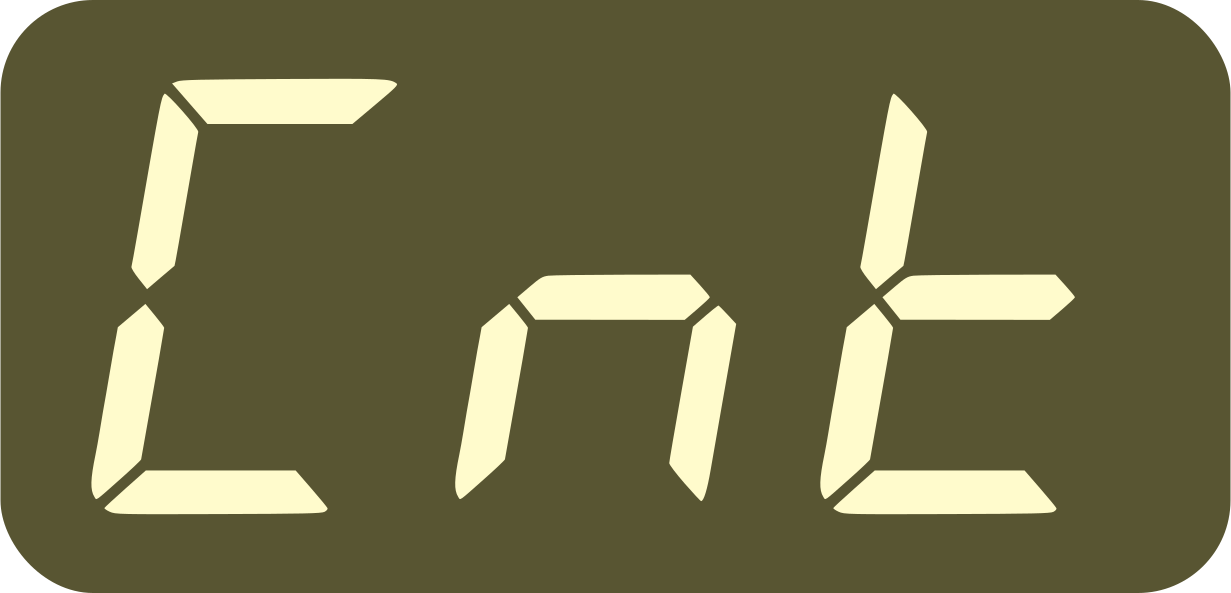 is set to (start count-off when
Muted), the autoplay setting determines which MIDI/ANLG output
starts after the count-off.
is set to (start count-off when
Muted), the autoplay setting determines which MIDI/ANLG output
starts after the count-off.
Extra functionalities
Syncing multiple Nomes together
To get more outputs you can sync multiple Nomes together. This sync is one-way only: one Nome will be the master and all the others will follow. The tempo and time signature numerator can only be changed on the master, while the time signature denominator can be set individually on each follower Nome.
There is no real limit regarding how many Nomes you can sync (in fact, we tested it with 36!), and this works with any combination of Nome I and Nome II devices.
To set it up, do the following:
On the master Nome:
Select the
→ 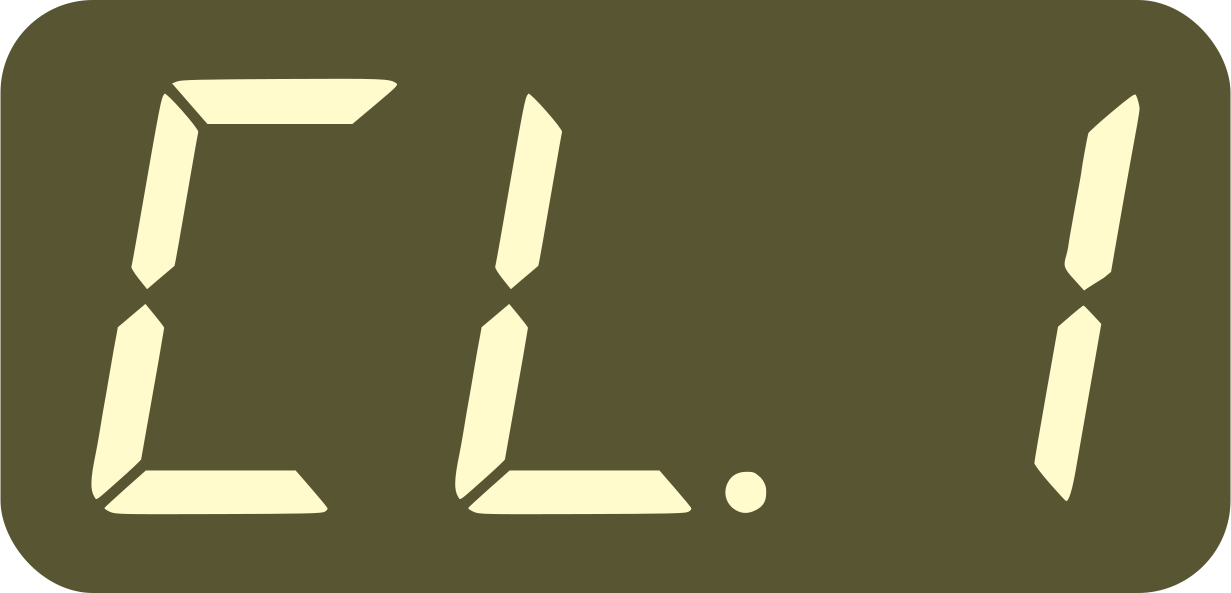 setting, and set it to 59
Press
for 1 secondThe value will change from 59 to
On every follower Nome:
Select the
→ setting, and set it to Press
for 1 secondThe value will change from
to
Now connect a 6.35mm jack cable from the AUDIO plug of the master Nome to the INPUT plug of every follower Nome (use Y splitter cables if syncing more than 2 Nomes).
For best results, set the audio output switch  to line out (
) on the master Nome.
to line out (
) on the master Nome.
To get a follower Nome to play automatically when the master Nome is
also playing, see the section
above about the
→ setting.
Tempo decimals
You can set the tempo down to the 100th decimal on the Nome, i.e. from x.00 to x.99.
The decimals are also:
automatically set when tapping a tempo
saved in the tempo presets
supported by U-SYNC 1.4 and newer
modifiable using MIDI CC Commands
On the device, press once to open the tempo decimal page.
The display will then show a dot and the decimal part of the BPM
“.xx”. For example if the current BPM shown is 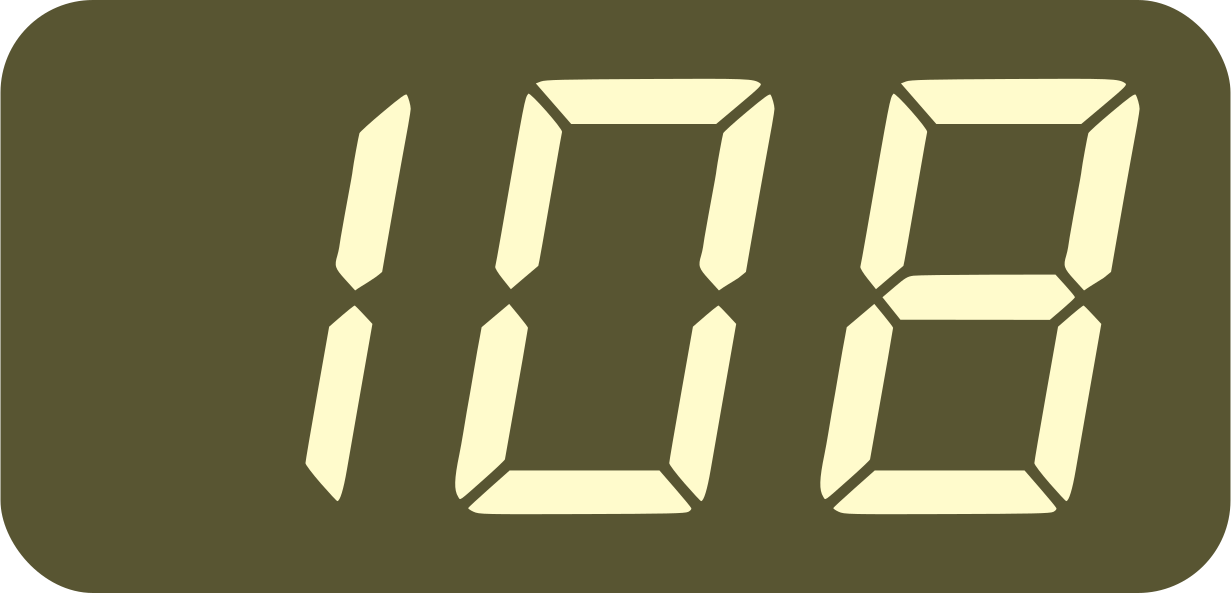 , and
pressing shows
, and
pressing shows 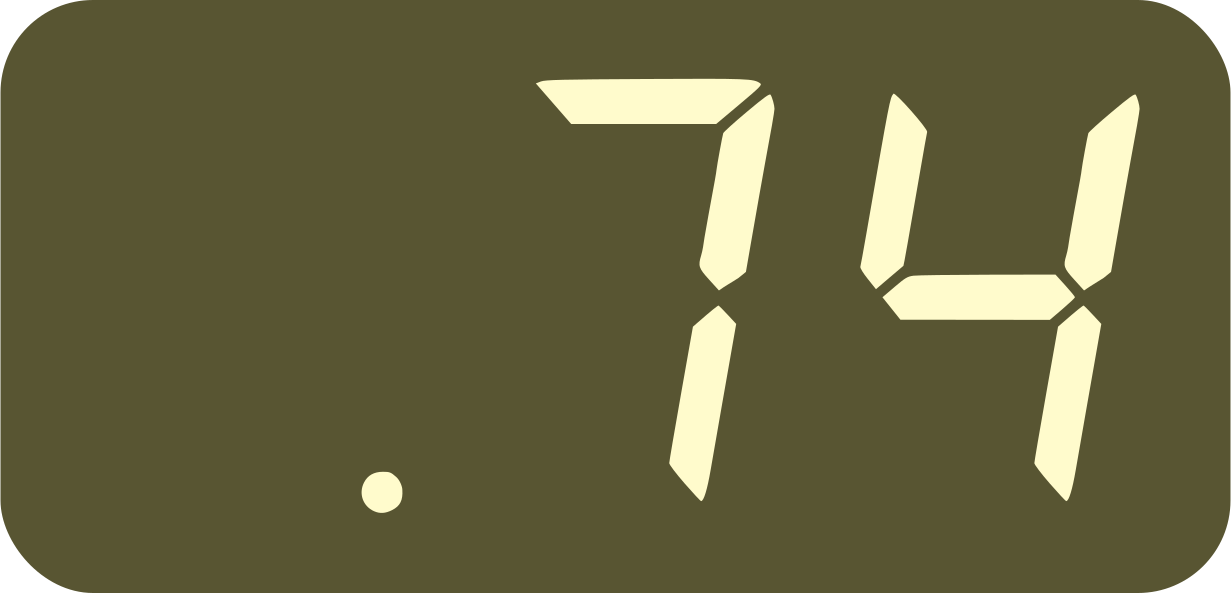 , that means the actual tempo is
108.74 bpm.
, that means the actual tempo is
108.74 bpm.
Note that:
You can instead hold down and turn
(while pressing) for a
quick adjustmentChanging to a new BPM integer number will
Reset the decimals when turning fast (for ex. 120.46 → 125.00)
Keep the decimals when turning slow (for ex. 120.46 → 121.46)
Count-in and count-off
Nome supports both a count-in, where the device counts down for you, and a count-off, where you count down by tapping and the device starts at the end of your count.
Count-in: count done by the Nome
Count-in is when you press the play button and the machine will count one bar for you until it starts.
To activate this, you can set the
→ →
setting to Then set the
→ → setting to
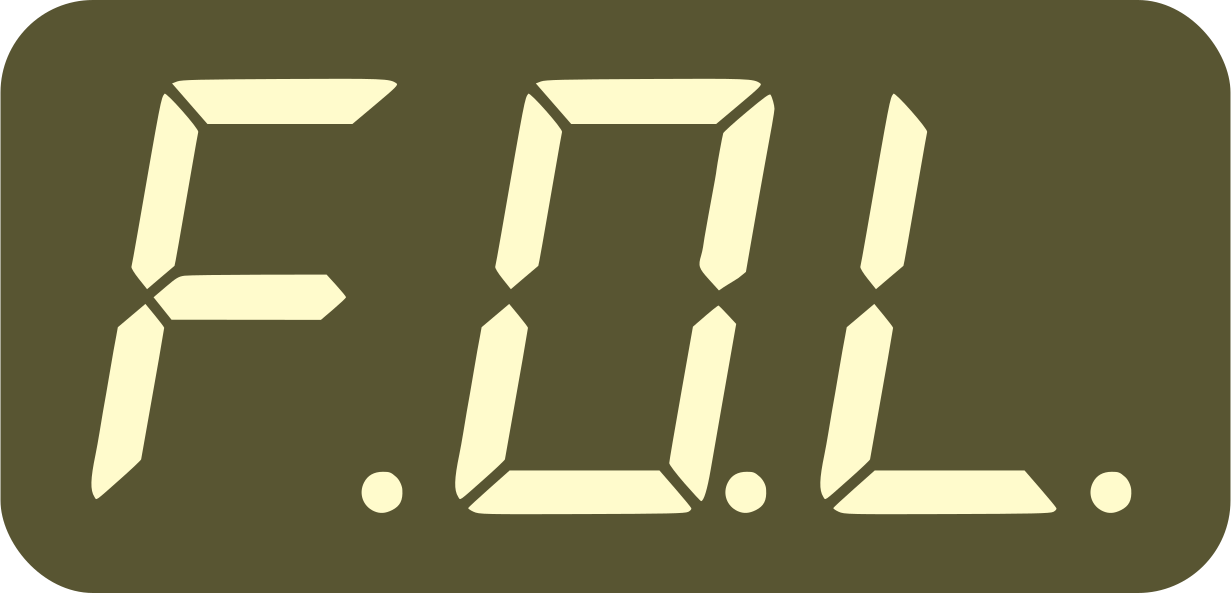 as well, so that the metronome is automatically unmuted
(both of these are advanced settings)
Then pressing the Play button will start the count-in right away, you will hear one bar of metronome and your machines will start on the next bar
Count-off: count done by the musician
Count-off is almost the same, except that you tap the bar of count-in yourself. This is a great way to set both the start point and the tempo, either at the beginning of a song or to catch a live tempo already running, as described in the section below.
To enable it, choose a value for the
→ settingThis setting determines when tapping will start a count or adjust the tempo
For example setting it to
(MIDI Out 1) means:tapping while the MIDI output 1 is stopped starts count-off
tapping while the output is playing will adjust the tempo
Then set the time signature, and tap exactly one bar, for example 1, 2, 3, 4
On the next bar, the machine takes over and starts everything
What MIDI/ANLG output is starts is what the
→
setting is set toWhen it is set to
, the metronome is unmuted and the
output that starts is the one indicated by the autoplay
setting
→ Note that the metronome is unmuted after the first beat, to avoid a “click flam” if a musician is slightly off-beat
After this, tapping will adjust the tempo, matching the music to the tapping
A double-tap on a pedal or a drum pad stops (and/or mutes)
It does the exact opposite of what was done after the count-off
Catch up live timing with Smart Tap Tempo
You can “catch” a live tempo already running, which is great if you are playing with live musicians without a metronome, or with a machine that cannot send a 1-24ppq signal to sync to.
Before trying to catch a tempo, it’s a great idea to set the start timing of the Nome right - you can do this by counting off.
Then, once started, simply tap, as the Smart Tap Tempo algorithm will set not only the tempo but also match the timing to your tapping. It might take a few beats to catch up, simply keep tapping until the music aligns.
Note that the LED will show you how precise your taps are by
changing its color:
Perfect Green means your taps are in time with the Nome’s internal timing
Perfect Red means your taps are at least 50% off
Anywhere in between will give you a mix of the two colors (green -> yellow -> red)
The Nome will try to keep the tempo stable as much as possible, while at the same time be ready to change the tempo if your tapping changes. To achieve this, it detects if your taps are regular or not:
When they are, they will be heavily averaged, so just keep tapping, the more you tap the more stable it will be
When not, it will “reset” the average so that the tempo can quickly change and follow your tapping
Pro Tip: If you want to temporarily disable the averaging, hold down the Setup button while you are tapping, this will let you make much quicker tempo changes.
Note: on any beta firmware, there is an extra feature for you
to check what the algorithm is doing under the hood: will
light up red every time the Nome “resets” the average tapped
tempo. Feel free to use this so you know when it happens.
This feature is not present in “normal” (non-beta) firmwares.
Match external gear’s timing with Time Nudging
The smart tap tempo mentioned above is great with a source with a variable or unknown tempo, like Live musicians for example.
But if you are trying to sync to a machine with a precise BPM, for example a DJ turntable, it is better to:
Set the same BPM (down to the 100th decimal) on the Nome
Use Time Nudging to match the timing
To nudge the timing, hold down and either or
. The left button will nudge backwards, the right button will
nudge forward.
This will “move” the timing of the Nome without changing its tempo. The longer you hold the buttons (you can let go of the Setup button), the faster the nudge will be.
The two buttons and will change from green to
red to indicate how fast the nudge is going.
Turn off the Nome
To turn your Nome off, simply hold down for 2 seconds. The
display will then show “OFF in 3 2 1” and then turn off.
To turn it back on, press any of those buttons: ,
or .
Update the Nome Firmware
Why update
New firmware versions are regularly released, and for now they are all free.
If you have never updated, then you are probably missing out on a whole lot of new features and bug fixes, and the settings shown in this manual probably do not match the ones on your device.
Feel free to have a look at the Nome Firmware Changelog for more details.
How to update
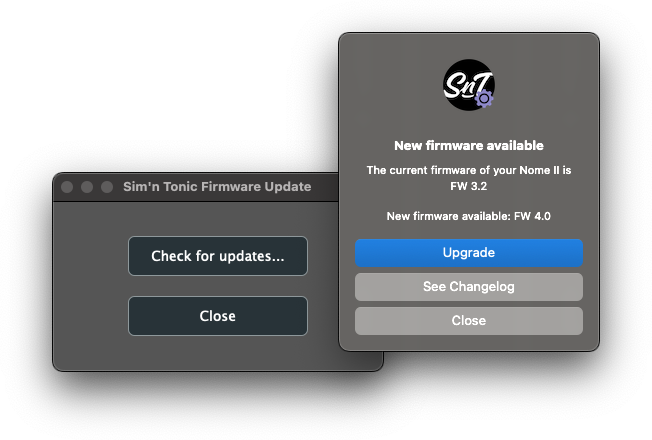
To update your Nome:
Download the Firmware Update tool
Launch it and click “Check for updates…”
How to load a custom, beta, or alpha firmware
The tool updates your Nome to the most recent firmware by default.
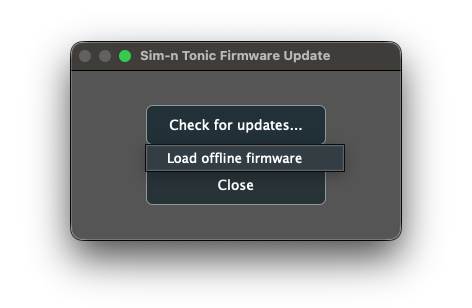
If you want to load a different firmware:
Download a specific *.fw firmware file (do not rename the file)
Launch the tool
Right click “Check for updates…” and load the chosen *.fw file
You can go back at any time to the newest firmware by left clicking “Check for updates…” again.
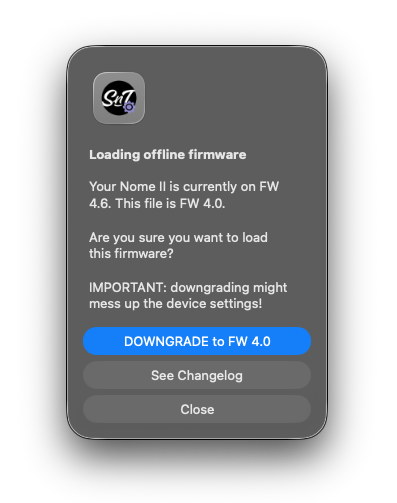
Important: switching to any firmware will not damage your device in any way, and it will be fully functional.
But downgrading might mess up your device settings (depending on which version). Upgrading back to the same version after a downgrade might also mess up your device settings.
(upgrading to a newer version after that will preserve the settings as normal)
In all those cases, make sure to remember what your settings were so you can set them back.
Troubleshooting
There is no way to “brick” the device (make it unusable), so feel free to unplug and restart the update if there is any issue. The update process should take no more than 15 to 20 seconds.
If your device is not detected, please check the USB cable and check in your OS if the device is recognized (Device Manager on Windows, Audio MIDI Setup on Mac). Please try disconnecting and reconnecting the device as well.
If none of this helps, you can force the “update mode” of the device by doing as follows:
Unplug the USB cable
Hold the TAP and the two play buttons down
Replug the USB cable while holding the 3 buttons
Wait 4 seconds (the screen will stay blank during that time)
After those 4 seconds, the device will start in update mode:
it will show “rdY” if it is connected successfully
(if not, check your USB connection/cable and check your OS)
Now, try running the update from the software tool again.
Nome II Quick Start: all setup answers
This is the complete setup reference for the Official Nome II Manual. All answers are available without completing a questionnaire or running JavaScript. Choose the sections that match your equipment; alternative synchronization methods are not instructions to enable every method at once.
These instructions cover firmware 5.5 and U-SYNC 1.4.1. Set up Nome II as the clock source for your instruments first, then add DAW or external synchronization if needed. The answer text below is shared with the personalized guide.
Setup instructions
For every setup: install the current firmware before configuring synchronization.
Update your firmware
Start by updating your firmware: download the Firmware Update Tool, and press “Check for updates…”.
Sync your MIDI gear
For synths or keyboards without a sequencer or arpeggiator: no clock is needed for notes played live.
Synths and keyboards without any sequencing or arpeggiating abilities are simply played live and do not require any clock.
But since you use a DAW, you can use the Nome as a usual USB-MIDI interface to send MIDI notes and other data from your DAW.
Simply connect a MIDI cable from  or
or  on the Nome to your synth’s MIDI input.
In your DAW, send MIDI to the USB-MIDI interface called “MIDI Out 1” or “MIDI Out 2”.
on the Nome to your synth’s MIDI input.
In your DAW, send MIDI to the USB-MIDI interface called “MIDI Out 1” or “MIDI Out 2”.
For clock-capable sequencers, drum machines, arpeggiators, loopers and MIDI effects:
Syncing MIDI gear to the Nome is very straightforward.
Sequencers and drum machines will sync to the Nome’s tempo but can also be started and stopped by the Nome using MIDI Start/Stop messages.
Arpeggiators, on the other hand, will follow the Nome’s tempo but will start their pattern when you play a note.
Most loopers can in theory follow the Nome’s tempo, they can also be started and stopped by the Nome using MIDI Start/Stop messages. But in reality, most of them struggle to do so: this is unrelated to the Nome and happens whenever the looper is following another device. If yours is one of those, you have two options:
Make the Nome follow the looper instead: use an auxiliary dedicated output on your looper to send regular sharp sounds to the Nome. See Sync to an analog clock or an audio signal for more info.
Sync to the looper “manually”: start it on time with the count-off feature, then use the Smart Tap Tempo and time nudging to keep it on time with the Nome.
Most effects pedals with a MIDI input will be able to follow the Nome’s tempo for time-based effects like delays and modulation.
To get your MIDI gear in sync with the Nome:
Search for “sync” or “clock” in your gear’s manual to find the right settings.
Use this to make sure they are set to follow an external MIDI clock, as well as Start/Stop if supported.
Connect a MIDI cable from the Nome’s
or to your gear’s MIDI input.
Use a DIN-MIDI cable or a
TRS-MIDI cable depending on your gear’s input.Press
and change the tempo with on the Nome to check it works.
For modular and Eurorack equipment with compatible analog clock inputs:
Sync your modular synths
The Nome has two 5V analog clock outputs on its 3.5mm stereo  port
(left and right channels, use a breakout cable to separate them).
Each output can send clock pulses (1-24ppq), a pulse on start/stop, or a run gate signal.
port
(left and right channels, use a breakout cable to separate them).
Each output can send clock pulses (1-24ppq), a pulse on start/stop, or a run gate signal.
Configure the port using the (left channel) and (right channel) settings.
Then connect a 3.5mm jack between the Nome’s port and your modular synth’s clock input,
and check that it follows the Nome.
Sync your vintage synths
For DIN Sync equipment, such as the original Roland TB-303, TR-606, TR-808, MC-202 and CR-8000:
The Nome can sync your vintage machines by sending a DIN Sync signal to them:
Configure the Nome by setting
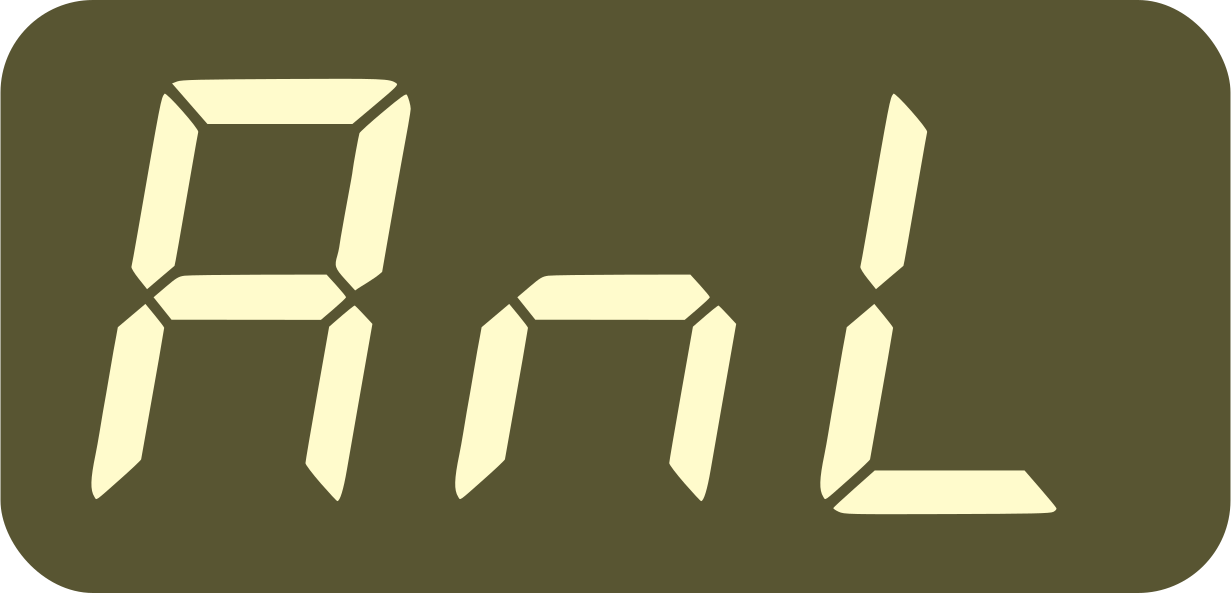 to .
to .Connect the
port on the Nome to the “sync in” DIN port on your vintage machine, using a special
DIN Sync adapter cable.
Do not use a usual TRS MIDI cable for this, as DIN Sync is not compatible with MIDI.Then press
on the Nome and check that your machine starts at the Nome’s tempo.
For vintage instruments with analog clock inputs, such as the SH-101 or Juno-60: check the instrument manual for the required clock rate.
Most of the other vintage gear can synchronize their internal arpeggiator or sequencer to the
clock output of the Nome.
To do so, configure the port using the (left channel) and (right channel) settings.
Then connect a 3.5mm jack between the Nome’s port and your vintage synth’s clock input,
and check that it follows the Nome.
The Nome only has one port, despite being made of two channels
(one DIN Sync connection uses both channels).
If you need more, you can:
Use a splitter cable to connect multiple devices to the same Nome output.
Use multiple Nomes - they can be synced precisely together
Time to add the DAW
Before getting into this, make sure your machines are following the Nome (sections above). The DAW will sync the Nome, which will sync your machines.
For macOS and a supported DAW: the questionnaire lists Ableton Live, Bitwig Studio, Logic Pro, Pro Tools, FL Studio, Cubase/Nuendo, Fender Studio Pro, Reaper and UA Luna. Check the U-SYNC manual for version and installation requirements.
Syncing the Nome and your DAW is done using our state-of-the-art U-SYNC technology.
U-SYNC only requires a  connection between the Nome and your computer,
it is insanely precise and very easy to set up. No dedicated audio output is needed.
connection between the Nome and your computer,
it is insanely precise and very easy to set up. No dedicated audio output is needed.
To set U-SYNC up:
Download it and install it
Load the U-SYNC plugin in your DAW
Connect the Nome to your computer via
Important: your Nome will not start your machines automatically when you start your DAW, unless you have enabled the “autoplay”
setting by setting .
In Ableton, Bitwig, Logic, Cubase, Nuendo, FL Studio, and Reaper, the sync will be bi-directional: you can change tempo or control transport from either the Nome or your DAW.
For Windows, Linux or another DAW without official U-SYNC support: use audio pulses instead. The named Midronome plugin is an example; its available binaries do not establish support for every OS or DAW.
We recommend using our technology U-SYNC to sync Nome and your DAW, but U-SYNC is currently only available on Mac for the DAWs listed on the questionnaire.
On Windows, Linux, or a DAW without official U-SYNC support, you can still sync the Nome to your DAW using this method:
Dedicate one physical audio output for sync.
In your DAW, send regular short sounds to this output (you can use a plugin to generate them like our old “Midronome” plugin).
Connect this output to the Nome’s
 plug.
plug.On the Nome, set
to match the speed of your audio - use for the Midronome plugin.Start DAW playback and check that the Nome follows, and that its
LED lights up.
PS: we plan on releasing a new version of U-SYNC, with support for Windows. Stay tuned!
For standalone operation without a DAW:
Choose your play behavior
The Nome is designed to follow its internal timing, which is always running.
You can see which beat it currently is on by looking at , or by listening to its metronome (click track).
When you press on the Nome, you can either:
Start on the next bar (waiting for the purple color on
) - this is the default behavior.Change the
(Reset mode) setting to start immediately, “resetting” the bar to when is pressed.
Whichever you choose, the internal timing, the click track, and all your machines will always be in sync with each other.
For DJ equipment: a dedicated regular pulse signal is required; Nome II does not detect the beat of an ordinary song or live audio.
DJ equipment
Nome II currently has no native direct synchronization with DJ equipment. But if you are not syncing the Nome to a DAW, and if your DJ turntable has an extra audio output, the Nome can follow it:
Send regular audio sounds at the song’s BPM on that output.
Connect it to the Nome’s
plug.On the Nome, set
to match the speed of your audio.Start playback on your DJ equipment and check that the Nome follows, and that its
LED lights up.
See Sync to an analog clock or an audio signal for more info.
PS: we also are working on a hardware expansion for the Nome designed to add synchronization via Ableton Link and Pro DJ Link, which should make it possible to sync natively and easily with most DJ equipment. Stay tuned for more info.
Get the live band on time as well
The large BPM display, rugged metal case, large knob and many remote control options make the Nome ideal for live setups!
For a drummer who can follow a click:
To send the click track to your drummer, connect headphones to the  port,
and set the headphones/line-out switch ( ) to the headphone position ( ).
port,
and set the headphones/line-out switch ( ) to the headphone position ( ).
Alternatively, set the switch to the line-out position ( ), and use a TRS jack cable to send the click track to a balanced line input
on your in-ear monitor mixer.
The metronome can use subdivisions on 8th and 16th notes when changing the bar signature setting 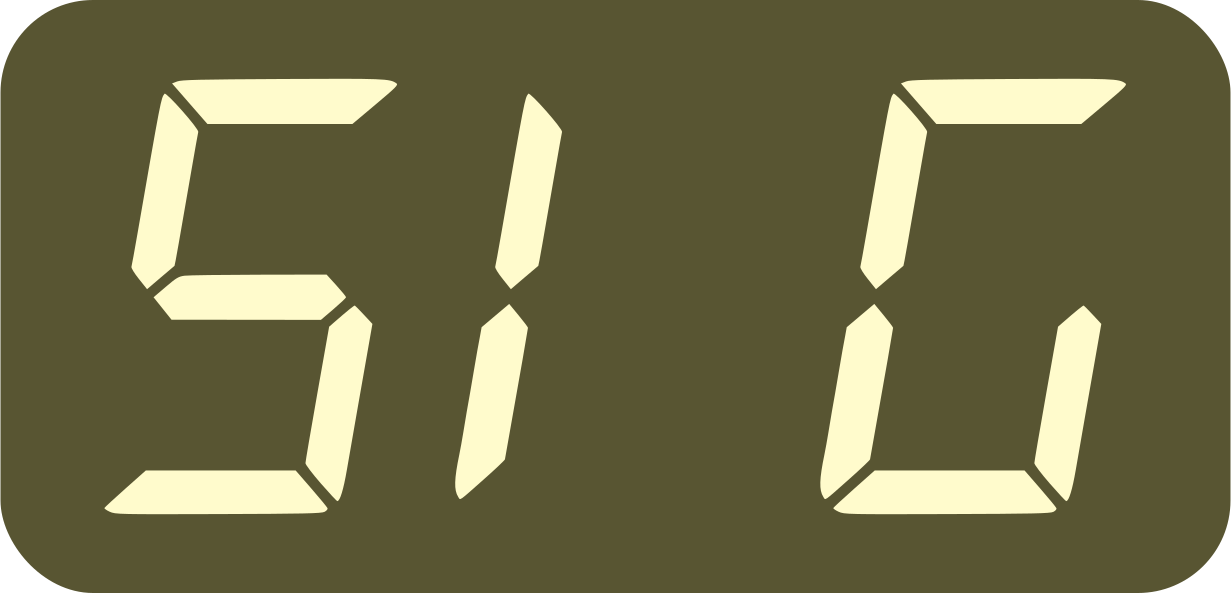 .
Each sound and volume is configurable, you can choose between 60 different click sounds, and even upload your own custom
sounds using the Config Tool.
.
Each sound and volume is configurable, you can choose between 60 different click sounds, and even upload your own custom
sounds using the Config Tool.
For remote control, connect pedals, a drum pad/trigger to the port. Configure it using the 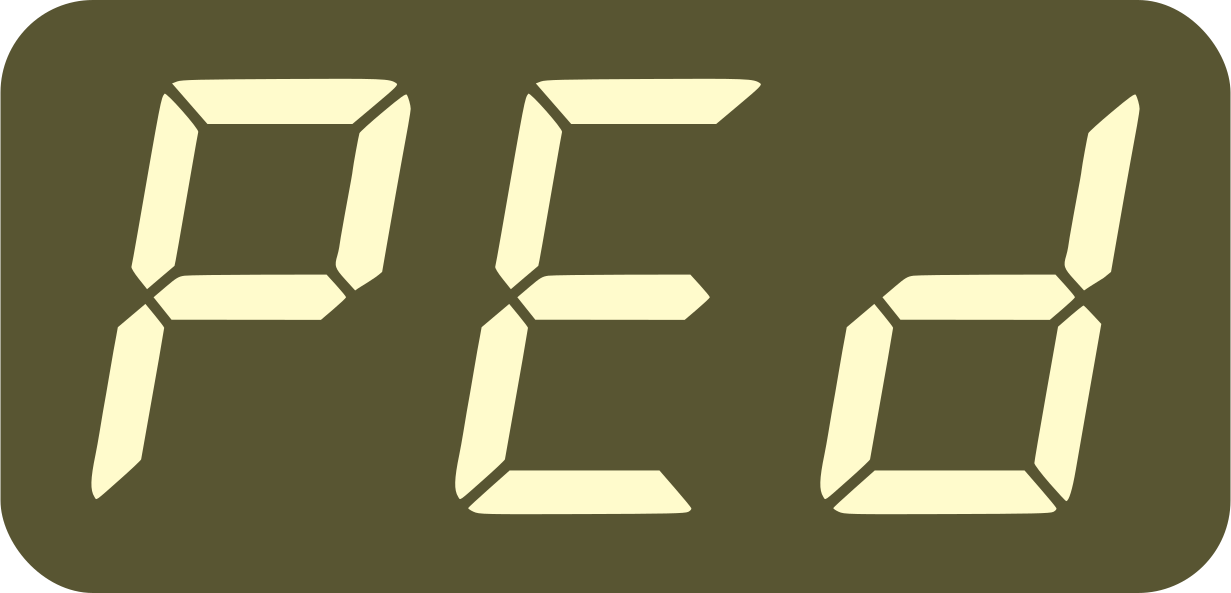 and settings.
You can use those to tap tempo, start/stop the Nome, load tempo presets, or even mute/unmute the metronome.
and settings.
You can use those to tap tempo, start/stop the Nome, load tempo presets, or even mute/unmute the metronome.
For a drummer who does not follow a click: timing must be adjusted by tapping; this is not automatic beat detection.
You can get the Nome to “manually” follow your drummer by regularly adjusting it. Start the song by counting off one bar with the band, so that the band and the Nome start on time and at the same tempo.
Then, when the live music starts to drift, use Smart Tap Tempo to smoothly readjust the timing of the electronic instruments to match the band.
See Count-off: count done by the musician and Catch up live timing with Smart Tap Tempo for more info.
Both the count-off and the Smart Tap Tempo can be done using:
The
buttonA pedal or footswitch connected to the
port (configured with the and 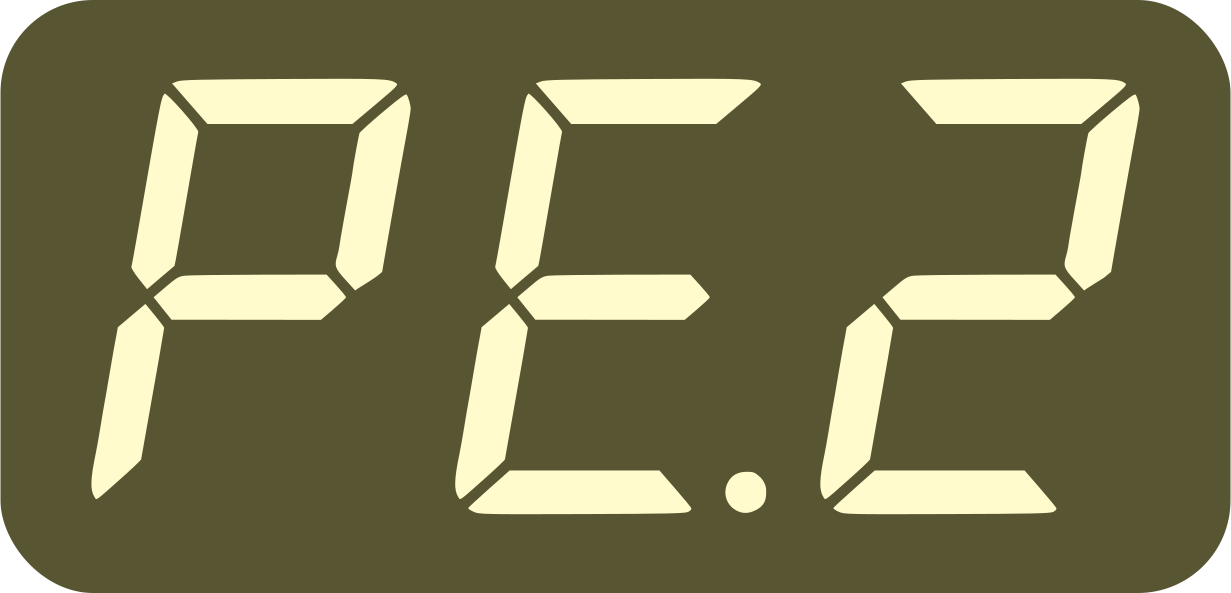 settings)
A drum pad or drum trigger connected to the
port (configured with the setting)A MIDI device sending regular MIDI CC messages to the Nome
You can use multiple of these methods at the same time, for example having the Nome sitting by the synth player, and a drum pad or pedal for the drummer to tap on.
Nome II and U-SYNC technical overview
Nome II is a MIDI Master Clock from Sim’n Tonic for synchronizing electronic instruments and live performance setups. It is the successor to Midronome (Nome I).
What does Nome II do?
Nome II sends MIDI clock and transport to compatible instruments. It also provides analog clock outputs for modular and Eurorack setups, DIN sync with the appropriate adapter and settings, and a built-in audio metronome for musicians.
See Nome II Quick Start: all setup answers for connections and setup, Buttons & Connectors for the physical controls and ports, and Settings for clock and transport settings. Connected instruments must support the relevant clock and transport signals.
What is U-SYNC?
U-SYNC is Sim’n Tonic’s DAW synchronization technology. It uses a plugin and USB connection to synchronize Nome II with a supported DAW, without routing an audio sync track through a dedicated audio-interface output.
This manual covers firmware 5.5 and U-SYNC 1.4.1. U-SYNC is currently documented here for Mac. Windows users can use the separate audio-based 24P workflow; this is not U-SYNC for Windows. Check the current U-SYNC documentation for supported DAWs and installation requirements rather than assuming every DAW is compatible.
Syncing to your DAW with U-SYNC (Mac): U-SYNC setup and links to its manual.
Syncing to your DAW using the 24P mode (Windows): the audio-based alternative.
Setup, updates and troubleshooting
Nome II Quick Start: all setup answers: choose the connections for your setup, including MIDI, analog clock and DIN sync.
Manual Contents: complete Nome II manual.
USB communication & commands: USB and MIDI communication.
Sync to other devices & DAWs: follow another device or DAW.
Update the Nome Firmware: firmware update instructions.
Product and brand
Sim’n Tonic is the brand behind Nome II and U-SYNC. The current website identifies the company as Sim’n Tonic ApS.
Common setup questions
These answers address questions raised in public Sim’n Tonic forum discussions and other musician communities. They apply to the firmware and U-SYNC versions named above; older forum replies may describe earlier capabilities. For every setup path, see Nome II Quick Start: all setup answers.
Why does my synth or arpeggiator not follow Nome II’s tempo?
Connect Nome II’s OUT 1 or OUT 2 to the instrument’s MIDI IN and configure the instrument to follow external MIDI clock. A setting that merely enables MIDI notes is not necessarily its clock-source setting. Check the receiving instrument’s manual for the exact option. Arpeggiators usually require you to play a note; following the tempo does not mean they start from Nome II’s Play button. Sequencers and drum machines must also support and accept MIDI Start/Stop to follow transport.
See Nome II Quick Start: all setup answers and Buttons & Connectors. A MiniNova setup discussion illustrates the distinction between MIDI input and clock-source settings.
Why is my sequencer running at a different musical rate from the click?
First distinguish the tempo from the number of notes or steps played on each beat. Check the receiving sequencer’s clock division and step length, and Nome II’s SIG time signature and click settings. For analog clock, match the pulses per quarter note expected by the receiving device using An.1 or An.2. For MIDI OUT 2, also check Mi.2, which can divide its MIDI clock rate. Do not assume one sequencer step must occur on every audible metronome click.
See Settings. A Moog Messenger discussion shows why clock rate, cable type and sequencer divisions must be checked separately.
Can I connect a MIDI output to an analog clock input with an adapter?
A passive cable does not convert MIDI messages into analog clock pulses. Use OUT 1/OUT 2 for MIDI inputs and ANLG for compatible analog clock inputs. The ANLG port provides two 5V channels on a 3.5 mm TRS connector; use a TRS-to-two-TS splitter when separate clock and run/reset connections are required, and configure An.1 and An.2 for the receiver. Check its required signal and voltage levels.
For DIN Sync / Sync24, set AnL to din and use the dedicated DIN Sync adapter. DIN Sync uses both ANLG channels and is not interchangeable with TRS-MIDI wiring. See Nome II Quick Start: all setup answers and Settings.
The DAW controls the tempo, but why do my drum machines not start?
Tempo synchronization and starting a sequencer are separate functions. Configure A.PL (Auto-Play) to start the desired MIDI output when external synchronization starts: bot for both outputs, Mi.1 for OUT 1, or Mi.2 for OUT 2. Also check that the receiving machine accepts MIDI Start/Stop. This applies when Nome II follows U-SYNC or the supported audio/analog pulse modes.
See Automatically start and stop sequencers. For a concrete DAW/hardware setup question, see the Ableton hardware discussion.
Can Nome II control my DAW’s tempo and transport while using U-SYNC?
U-SYNC synchronizes Nome II to the DAW. Bidirectional control is an additional integration that lets Nome II send tempo and transport commands back to supported DAWs; it is not the same as making the DAW follow incoming MIDI clock. Follow the U-SYNC manual’s installation and control-integration instructions for your exact DAW and plugin version. The setup reference lists the supported bidirectional DAWs for this documented release. Do not apply an older forum statement about missing DAW control to a newer release without checking its documentation.
See The DAW Control and Nome II Quick Start: all setup answers. This distinction occurs in Logic workflow questions and Logic transport questions.
Should I also enable the Nome II Clock USB-MIDI input when using U-SYNC?
No. The Nome II Clock USB-MIDI input is the separate route for software that follows MIDI clock. The manual explicitly says not to use it with U-SYNC. Choose one synchronization route and configure the U-SYNC DAW-control integration separately where supported. Ordinary MIDI note forwarding through Nome II is a different function.
See The Clock interface, The DAW Control and MIDI Forwarding interfaces Out 1&2.
Does U-SYNC also correct the timing of MIDI notes sent by my DAW?
For U-SYNC 1.4.1, do not assume that clock synchronization also schedules your DAW’s individual MIDI notes. Nome II can merge and forward MIDI data from its USB output interfaces to its physical MIDI outputs, but this is distinct from synchronizing a hardware sequencer’s clock. When diagnosing a late recording, identify whether notes come from a clocked hardware sequencer or from the DAW, then check the DAW’s routing and recording/monitoring latency settings for that path.
See MIDI Forwarding interfaces Out 1&2 and the DAW-sequenced notes discussion. Do not treat a planned feature mentioned in an old thread as a released capability.
Can I distribute Nome II’s clock through a USB-MIDI host or MIDI router?
For timing-sensitive hardware, use Nome II’s physical MIDI outputs where possible. A USB-MIDI host or router introduces another part of the timing path; its behavior must be assessed in the actual setup. Connecting Nome II by USB for U-SYNC does not require you to distribute clock to every instrument over USB. You can use U-SYNC between computer and Nome II, and physical MIDI or ANLG from Nome II to the instruments.
See Nome II Quick Start: all setup answers and the support response in the CME H12MIDI Pro discussion.
Why does Play wait for the next bar instead of starting immediately?
In standalone operation, the default behavior starts playback on the next bar of Nome II’s already-running internal clock. rES (Reset mode) changes the reset/start behavior; use the settings table to choose the immediate-start behavior. Cnt (count-off) and PL.1/PL.2 button functions are separate settings, so check those as well when a button behaves differently from expected.
See Settings and Nome II Quick Start: all setup answers. Start delay and count-in are recurring topics in the Nome questions forum.
Will a looper or a live drummer stay synchronized automatically?
A looper must support external clock, and its response to clock and transport is specific to that model. If it does not follow satisfactorily, the setup reference explains alternatives: send dedicated regular pulses from the looper to Nome II, or use count-off, Smart Tap Tempo and time nudging to keep time manually.
Nome II does not detect the beat in arbitrary live audio. For a drummer who does not follow a click, use count-off and Smart Tap Tempo; these require taps from a person or an appropriate control source. Firmware 5.5 includes Smart Tap Tempo, so older descriptions of the original tap-tempo behavior are not the current instructions.
See Count-off: count done by the musician, Catch up live timing with Smart Tap Tempo and Match external gear’s timing with Time Nudging. Related discussions include looper setup and tap tempo.
Can Nome II follow a DJ set, Ableton Link or Pro DJ Link directly?
This documented setup has no native direct DJ synchronization. Nome II can follow regular sharp pulses sent to INPUT when inP matches their rate. An ordinary song sent to INPUT is not a substitute for that pulse signal. The Quick Start mentions a planned expansion for Link integration; that announcement is not an instruction to use a built-in Link feature.
See Sync to an analog clock or an audio signal and Nome II Quick Start: all setup answers. DJ sync and Ableton Link are also raised in the Nome questions forum.
Can I use Nome II on Windows, and why are USB-MIDI ports missing after an update?
Nome II’s USB-MIDI functions and the availability of the U-SYNC plugin are separate. For the release covered here, U-SYNC is documented for Mac; Windows users can use the 24P audio-sync workflow instead. The USB-MIDI interfaces may have generic names on Windows. If interfaces are missing after a firmware update, follow the manual’s instructions to remove the previously registered device setup in Windows Device Manager or macOS Audio MIDI Setup, then disconnect and reconnect Nome II.
See USB communication & commands, Update the Nome Firmware and Syncing to your DAW using the 24P mode (Windows).